Showing posts with label Recipe Cards: Herbs/Home Remedies. Show all posts

Monday, November 15, 2021

DIY All Purpose Floral Salve and Lovely Lip Gloss ~ Great Gifts


“If we allow our "high creativity" to remain alive, we will never be bored. We can pray, standing in line at the super market. Or we can be lost in awe at all the people around us, their lives full of glory and tragedy, and suddenly we will have the beginnings of a painting, a story, a song.” 
~ Madeleine L'Engle

There are times in a homemaker's life where she may feel stagnant and dull. Though this is far from true, I have found that living creatively and maintaining little projects along the way, add an immense amount of joy to the homemaking role. THERE IS NEVER TIME TO BE BORED! In this case, I have been looking at all my beautiful dried flowers with a desire to use them in a lovely way. This salve came to mind as all of these favorites are excellent medicinal herbs for women's skin care as well as quite aromatic for the feminine heart.  I’m excited to share this “ode to femininity” salve which will make for an all-purpose skin healer and lip gloss. I’ve named it my “floral salve”.  


To make this, I placed an equal amount of each of the following flowers to a clean jar (you can use any size jar you want in order to get the yield you want). Leave about 1 - 2 inches headspace at the top of the jar to leave room for the oil to cover the herbs. 

- 1 part of dried rose petals
- 1 part of dried chamomile
- 1 part of dried lavender buds
- 1 part of dried calendula

Next I poured in extra virgin olive oil (you can also use a good quality almond oil, sunflower oil, jojoba oil, coconut oil and/or grape-seed oil).  Cover the flowers in the oil by at least 1-2 inches (making sure they are completely submerged the entire time. To keep the herbs covered, I usually shake the jar once a day or so). 

This is a very flexible recipe and I encourage you to use what you have. If your apothecary has lavender and chamomile, just use those. With the addition of essential oils at the end, you will still have a fine and worthy salve! I am the queen of making do and I encourage you to do the same if necessary (during certain times in my budget, it is necessary). 


Screw the lid on firmly and let the mixture steep in a warm, sunny spot for 2 - 3 weeks (you can cover the jar of oil with a light cloth if you want to avoid direct sunlight). I usually place my infusions on my kitchen sill. When the time is up, strain the solids through a fine cheesecloth or a piece of thin cotton/muslin to remove all particles. I found that double straining with a second time through cotton works best. Pour into a clean, dry jar and measure out the amount of oil you have.


In a double boiler, gently heat your (measured out) floral infused oil for a few minutes.

(To bypass excess clean up, save up some of your discarded canned food tins to make a disposable double boiler (that means you don't need to clean up the wax residue after - you just toss your can!). Just add a few inches of water into a sauce pan and place your clean can inside. Add the wax to the can and you have a makeshift double boiler!)


Add in 1/4 c. of beeswax for every 1 cup of oil you measured (you can also add in some shea butter at this point for extra moisturizing abilities).


Stir occasionally until everything is gently melted together. I use a wooden skewer to stir so that it can be thrown away after for easy clean up.Remove your mixture from heat.  I divided my mixture in half at this point so that I could do half as all-purpose skin salves and half as tinted lip glosses. 

*Now is also the time to add in some coloring if you would like to make a tinted lip gloss that is shown in the pictures. It isn't necessary to add in the color, but it is fun. Once your beeswax and oil solution is melted, simply add in some lipstick (there is no ratio to this, just go by sight). I used an all-natural lipstick color that my daughter purchased which was too dark for her. Once it was added to the solution, it was a beautiful hue. But to be honest, it is very light on the lips (so don't expect a dark color, it is a lovely light gloss). This is also a great way to use up the bottom of the lipstick tube if you are a lipstick wearer. Just go in there with a toothpick or something to remove the excess and melt it into the warm solution. I used a whole tube of lipstick for one cup of floral oil. 


Once your mixture is removed from heat, stir it a bit to cool it off as you don't want to add the essential oils to a hot mixture (it will evaporate the oils). But you don't want it too cooled off as the oil mixture will start to set into a salve (if this happens, just warm it up again)!
 
Now -- stir in the essential oils. For the basic salve recipe I would add 10 drops of your favorite floral essential oil to every cup of your infused oil to give it a stronger potency of medicinal benefits and a longer shelf life.

For instance, I had a yield of 2 cups of oil. I used the following essential oils which are excellent for our skin:

- 5 drops of lavender essential oil
- 5 drops of chamomile essential oil
- 5 drops of geranium essential oil
- 5 drops of rose absolute (you can use rose essential oil if you have the luxury or Palmarosa essential oil)

This equals 20 drops of oil - AKA -  10 drops of essential oil for every cup of floral oil used.


I usually stir the solution for another minute before pouring the warm liquid into lip gloss tins (0.5 ounce), salve tins (1.0 ounces), small canning jars or even recycled baby food jars. The salve will firm up within the hour or so.


This all-purpose skin salve can be used for many concerns such as bites, burns, stings, rashes, cuts, inflammation, chapped skin, wounds and/or dry skin conditions. It should last for six months to one year if stored in a cool, dark location. The lip gloss can simply be used as a lip moisturizer. I think these would also make lovely gifts for the sweet women in your life.

Happy herbal homemaking! 

❤ JES


Tuesday, August 31, 2021

DIY Easy to Make ~ Herbal Wax Sachets


 “If you have been afraid that your love of beautiful flowers and the flickering flame of the candle is somehow less spiritual than living in starkness and ugliness, remember that He who created you to be creative gave you the things with which to make beauty and the sensitivity to appreciate and respond to His creation.” 

~ Edith Schaeffer, The Hidden Art of Homemaking

My 20 year-old daughter and I spent some time in the kitchen today with the heavenly scent of herbs and oils and wax. We melted, slowly stirred and delicately drizzled the slightly set “sachets“ with dried flowers and aromatic citrus. It is like capturing the seasons in a beautiful fragrant bar.


We will place our herbal wax creations in our closets and drawers to scent our little spaces for the chilly, cozy, autumn months ahead… we’ve done these kinds of projects together through all our years of homeschooling. It is a delight to do them now simply for the love of homemaking…


Supplies (some of these links on this post may be affiliate links):
  • dried herbs, dried flowers, dried fruit, dried spices  -- Some ideas include dried lavender, calendula, roses, hibiscus leaves (for color), chamomile flower, dried citrus (tutorial here), cloves, cinnamon sticks, cardamom, allspice (I will be making fall-related ones next!), etc.
  • essential oils (your choice) -- I use the least expensive ones like orange for these types of projects.
  • baking tins, baking molds, silicone molds -- You can use cupcake tins, candy molds, silicone molds or even these ornament molds (shown two pictures below) that you can hang. Note: you can also poke a hole with a skewer (once they have completely cooled) in the top of the sachet to hang them from a hanger, doorknob, etc.
  • double boiler (see my makeshift, shortcut version below)

Make shift double boiler:

To bypass excess clean up, save up some of your discarded canned food tins to make a disposable double boiler (that means you don't need to clean up the wax residue after - you just toss your can!). Just add a few inches of water into a sauce pan and place your clean can inside. Add the wax to the can and you have a makeshift double boiler!


To Make Herbal Wax Sachets:

Slowly melt down soy-wax or beeswax in a double-boiler, once slightly cooled, stir in essential oils of choice, pour into molds (baking tins, etc.). Stir in herbs and dried citrus if you’d like. Once wax has slightly set, sprinkle additional dried flowers on top for extra decoration and fragrance. Do not remove sachets until they have completely cooled at room temperature.


Place finished products in closets and drawers to naturally scent and freshen the air.


These kind of projects are fun to make but also add a bit of charm into your life and we could all use a dose of that right now. Happy homemaking!

🌿🍊πŸ₯€ 


Monday, November 2, 2020

DIY Sweet Lavender Botanical Perfume ~ All Natural Essential Oil Blend


"And lavender, whose spikes of azure bloom
shall be, ere-while, in arid bundles bound
to lurk admist the labours of her loom,
and crown her kerchiefs witl mickle rare perfume."
~ William Shenstone (1742)

These "Sweet Lavender" botanical perfumes provide an all-natural scent while integrating a sense of relaxation via aromatherapy. They are very simple to make and don't have any of the toxins found in traditional perfumes. They are also convenient to carry around and make lovely gifts! 


In order to prepare this project, you will need the following* (some of which are affiliate links to the products I used):
  • dried lavender flowers (optional but pretty), 1/8-1/4 tsp. of lavender buds per bottle
  • 10 ml roll top bottle (you can also recycle essential oil bottles)
  • small essential oil funnel
  • sweet almond oil (or fractionated coconut oil, sunflower oil, or mild carrier oil of your choice)
  • roman chamomile essential oil, 1 drop per bottle
  • lavender essential oil, 2 drops per bottle
  • peppermint essential oil, 1 drop per bottle
  • juniper essential oil, 1 drop per bottle
  • vanilla oleoresin essential oil, 2 drops per bottle (you can also use 1/4 tsp. vanilla extract if you need to be resourceful but it will cloud the look of your blend. If you do use it, I would omit the lavender flowers and add the extract in the first step.)

* If you haven't yet built up a collection of essential oils, then this can be expensive to prepare. With that in mind, you can try for a more frugal version by experimenting with a simple mixture of lavender and vanilla essential oil to get a nice basic blend.

1. Begin by filling each bottle with 1/8-1/4 tsp. of lavender buds if you are using them.

2. Using a small funnel, carefully fill each bottle with your carrier oil (almond oil, fractionated coconut oil, sunflower oil) making sure to leave 1/4 inch headspace. As you can see, this can get messy!

3. Next, add the essential oils (amounts are shared above).

4. Fill up the remaining of the bottle with carrier oil (up to the neckline) if necessary.

5. Press roller ball lid onto each bottle and shake each bottle to blend your perfume.  


And you are finished! I like to let the blend "marry" for 24 hours and then test the aroma. You can label them if you choose or keep them in their "au natural" setting. I think they smell divine but feel free to add or subtract the ingredients to make it pleasing to your senses. 

Use this as you would perfume (though keep in mind that since it is natural, you may have to do a few applications during the day to keep up the scent). To get the aromatherapy benefits, make sure to inhale the fragrance nice and deeply each time you apply it for relaxing results! 


Wednesday, August 9, 2017

About Peppermint {Information, Recipes, DIY's} ~ Herbal Link Up


"This easy-to-grow plant is excellent to keep on hand not just for its ability to soothe an upset stomach, but also for its usefulness in relieving sinus, nasal, and chest congestion during cold and flu season. When applied externally, say in a poultice, compress, or herbal bath, it’s fabulous for soothing sore or tired post-workout muscles and relieving pain from minor sprains and strains. Buy it in everything from seed to tea to essential oil."
**Please note that this is a special edition link up we are running which is separate from our regular weekly link up, The Art of Home-Making Mondays.** Learning from other women about herbs is something that really interests me and here is the place where I would love for you to share!

This summer, please link up all of your articles (past & present) which pertain to the herb:

~ PEPPERMINT {MENTHA PIPERITA} ~

This can include herbal recipes and remedies, informative articles, how to grow peppermint, bath and body recipes, culinary recipes and preserving with peppermint. Our link up will be running until the end of September - 2017 in order to collect a sizable archive of peppermint information. {Please understand that all posts which do not pertain to the peppermint plant will be deleted in order to maintain the goal of this post.} Thank you for joining us!

This post is a part of our Create Your Own Home Pharmacy Series.

Don't know where to find dried peppermint? I purchase my supplies here (these are affiliate links):


All the fine print. This post may be shared with some or all of the following link-ups: The Art of Home-Making MondaysModest Mom Monday'sMonday's MusingsGood Morning Mondays,  The Scoop, Tuesdays with a TwistRaising HomemakersWise Woman Link UpHomestead Blog Hop Wow Us Wednesdays,  Coffee and ConversationHomemaking ThursdaysHome Sweet HomeOur Simple HomesteadAwesome Life Friday Link Up and Create, Bake, Grow & Gather. Thank you lovely ladies for hosting these. This post may contain affiliate links (which are merchant links that help to support this site at no additional cost to you if you purchase an item through them).

Wednesday, July 5, 2017

How to Make Peppermint Medicine ~ Home Apothecary Series


"Peppermint is one of humanity’s favorite and most uplifting flavors. It is carminative and anti-spasmodic, having a relaxing effect on the muscles of the digestive system; it combats flatulence and stimulates bile and the flow of digestive juices. It is carminative, diaphoretic, and anti-emetic. As a mild anesthetic to the stomach lining, it often allays feelings of nausea. It is nervine, and anti-microbial. This plant (combined with Elder and Yarrow) is a traditional treatment for fevers, colds, and influenza and thereby has saved countless lives throughout the ages."


Peppermint, which is a hybrid mint (a cross between watermint and spearmint), is what I would call a "pretty" herb! It is pretty refreshing, pretty tasteful, pretty medicinal and pretty much a plant that you can do many wonderful things with in your home. It is considered a nervine stimulant but in an nourishing way for your body instead of a depleting way like coffee and sugars. According to herbalist Rosemary Gladstar, "they activate the nerve endings by increasing circulation, providing nutrients, and increasing vitality and zest. They neither provoke the system nor agitate it".  Though commonly known as a digestion aid, it is also helpful for easing nausea, flatulence, stomach cramps, clearing sinuses, headaches and for freshening breath. Yes, peppermint is a pretty amazing herb! And while peppermint oil can be used to treat these same concerns, this post is focused on sharing recipes which use the actual herb.

"The popularity of peppermint is based on its volatile oil, which contains an abundance of menthol, a time-honored and clinically proven aid to digestion. Menthol is also a mild antispasmodic which makes it useful for relieving menstrual cramps and nausea. It is also a mild vasodilator, creating a warm or flushed feeling by stimulating circulation."
~ Mark Pedersen, Nutritional Herbology


DIY Peppermint Extract (aka Tincture)

This tincture can be used as a culinary mint extract in the kitchen, to aid digestion, relieve gas and heartburn, reduce colic and cramps, relieve nausea and vomiting and help to calm upset stomachs. The average recommendation for adults is 10 - 15 drops (or 1 - 2 dropperfuls) of peppermint tincture to water or warm tea and to drink the dosage 3 - 4 times per day (as needed). You will find the easy recipe here!


DIY "Pick Me Up" Tincture

With this trio of herbs and honey, your body will receive many of the vitamin and minerals that have been zapped from stress and will revitalize and refresh you! Another bonus is that peppermint is a digestive aid and will help with any sluggishness you suffer because of poor digestion (thus providing you with more energy!). You will find our recipe here!


DIY Peppermint Infused Muscle Strain Medicinal Massage Oil

When those muscles start to ache and tense up, massage in this medicinal oil for some therapeutic relaxation and herbal relief. You will find the simple recipe here!


DIY Breathe Better Vapor Rub

You can prepare a vapor rub with peppermint leaves and a few other useful herbs that aid in congestion. Our frugal recipe for the pictured "Breathe Better Vapor Rub" is found in our Ebook here. For the version which utilizes peppermint essential oil, visit here


DIY Peppermint Herbal Honey

For a fun and medicinal food to add to your pantry, infuse raw honey with peppermint and use like you would any "normal" honey (while gleaning the herbal benefits described in this article!). This honey can also be used to sooth burns (honey acts as a healer and protective guard while the peppermint will cool and relieve the pain). To prepare it, simply use dried peppermint in place of the herb found in this recipe.


Peppermint Tea/Tisane

Peppermint makes a tasty and nourishing daily tea which provides an excellent source of minerals like potassium, calcium, iron, manganese, magnesium and much more! It can also be used to heal your body from cold and flus. Drink the tea before and after meals to help prevent heartburn and aid in digestion. It can be used to treat IBS symptoms as well. In addition, the flavor of peppermint will also enhance other undesirable tea blends so feel free to add this herb for its culinary abilities.

Tea/Tisane Blend Ideas:
  • Headache Tea: equals parts of chamomile and peppermint
  • Wake Me Up Tea: equal parts of green tea and peppermint
  • Tummy Tea: equal parts of chamomile, dill leaf/seed and peppermint


Nourishing Female Tea Blend

Tea blends are a soothing way to feed your body the vitamins and minerals it needs. The peppermint in this blend acts as a stimulant; increases circulation, provide nutrients and increases vitality -- something many of us ladies desire! You will find the recipe here! You will also find more tea blend ideas with peppermint here.


Peppermint Tub Tea

Prepare a tub of peppermint tea and soak in the stimulating bath blend! You can hang a bath bag filled with the leaves under the running hot water to infuse the tub water. You can add a handful of peppermint into the tub and soak directly. You can also heat up a kettle of water, pour the herb in a large heatproof bowl, let steep for 30 minutes, and then strain the “tea” into the prepared tub. For an invigorating blend to boost circulation and ease sore muscles, consider mixing peppermint together with lemon peel, rosemary and/or ground ginger. 

Herbal Steam Nasal Congestion Treatment

Place approximately 3 tbsp. of fresh mint leaves (or 2 tbsp. dried) in a bowl filled with boiling hot water. Let cool slightly and place a towel over your head and the bowl and inhale for a few minutes to relieve nasal congestion. Be careful not to scald yourself in the process.


Peppermint Link Up ~ Care to Share?

Do you have any recipes or information on peppermint usage? We would love for you to share with us! Please join our all about peppermint link up which will be coming soon! It will be open until the end of this summer (September 2016) in order to give you the opportunity to share all you have on this amazing herb! Stay tuned!

This article is a part of our Create Your Own Home Pharmacy Series.


Disclaimer: I am not a certified herbalist but a homemaker interested in the arts of natural healing. The information I have learned has been gleaned through study of some of the following favorite books; Rosemary Gladstar's Medicinal Herbs: A Beginner's GuideGrow Your Own Drugs by James Wong, and The Complete Illustrated Book of Herbs by Reader's Digest and websites of herbalists (such as the Bulk Herb Store Blog).

I am not a doctor. While I do seek scientific confirmation of the safety and effectiveness of the herbs and remedies I use, remember that using remedies is a personal decision. Nothing I say on this blog is approved by the FDA or intended to diagnose, treat or prevent disease. All things on this blog are my opinion or the opinion of others. Also, if you have a medical condition, are taking pharmaceutical drugs, or are pregnant, please consult your physician prior to taking herbs.

All the fine print. This post may be shared with some or all of the following link-ups: The Art of Home-Making MondaysModest Mom Monday'sMonday's MusingsGood Morning Mondays,  The Scoop, Tuesdays with a TwistRaising HomemakersWise Woman Link UpHomestead Blog Hop Wow Us Wednesdays,  Coffee and ConversationHomemaking ThursdaysHome Sweet HomeOur Simple HomesteadAwesome Life Friday Link Up and Create, Bake, Grow & Gather. Thank you lovely ladies for hosting these. This post may contain affiliate links (which are merchant links that help to support this site at no additional cost to you if you purchase an item through them).

Wednesday, March 22, 2017

DIY Peppermint "Pick Me Up" Tincture Blend


"When you are stressed, depressed, and worn out, the last thing you need is to have your system roused with caffeine-rich foods, sugar, or drugs -- all common "remedies" for the blues. Instead, mild herbs that gently and surely nourish and spark the system are appropriate; they activate the nerve endings by increasing circulation, providing nutrients, and increasing vitality and zest. They neither provoke the system nor agitate it."
~ Rosemary Gladstar, Herbal Recipes for Vibrant Health

I love to experiment with herbs in the kitchen and concoct! Once you learn their specialized properties, you can create your own medicinal mixtures based on your individual needs.  I am particularly drawn to the everyday necessities of the busy homemaker, for as I age, I notice my energy levels aren't what they used to be (and I am highly enticed by another cup of coffee!). Most of the time, I drink our Homemaker's Helper Tea and this blend keeps me feeling strong and capable. However, when my schedule gets thrown off due to unforeseen situations, family emergencies and so forth, there isn't time for that cup of tea. This is why our "pick me up" tincture was born.


This simple recipe uses the "nerve" nourishing properties of peppermint, lemon balm and nettle.  The peppermint acts as a natural stimulant, increases circulation, provide nutrients and increases vitality. Lemon balm is a strengthening nerve tonic which is high in calcium, magnesium, B vitamins and protein. And lastly, nettle is another excellent tonic herb for women. It is a rich source of iron, calcium, B vitamins and vitamin A. With this trio, your body will receive many of the vitamin and minerals that have been zapped from stress and will revitalize and refresh you! Another bonus is that peppermint is a digestive aid and will help with any sluggishness you suffer because of poor digestion (thus providing you with more energy!).


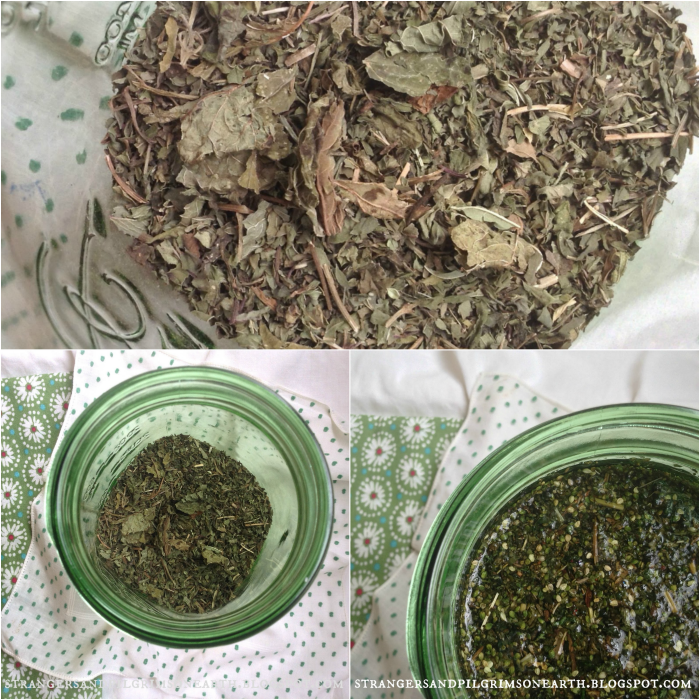
1. To prepare our "pick me up" blend, simply place 1/2 cup each of the following dried herbs inside of a clean, quart sized, glass jar (if using fresh herbs, use a heaping 1/2 cup):


2. Next, add either 80-100 proof vodka or apple cider vinegar to the jar until it is 3/4 of the way full.
  • Though alcohol will make the strongest tincture (please read this post if you have any concerns about the use of it in your medicine cabinet), you will find the pros and cons of both vodka and vinegar in our how to make a tincture post.
  • You could also use food-grade glycerine (in lieu of vodka and vinegar), but will need to follow different instructions for the tincture making process which will be found in our how to make a tincture post. Just use the herb amounts from this post but omit the honey. Glycerine is sweet enough!


3. Fill the remaining of the jar with raw honey (leaving about 1-inch head space from the top of jar).  I included the honey for the happy flavor and because it is a natural energy booster. Feel free to omit it from the recipe if you like.

4. Cap the jar tightly and shake well to blend the mixture. If using a metal lidded jar, cover jar with a piece of plastic or wax paper prior to screwing on the lid. You don't want the metal to be in contact with the tincture to corrode it.

5. Label your jar with the name of herb, date and the medium used (i.e., alcohol or cider vinegar).

6. Store in a cool, dark area like your pantry. Let the mixture sit for 4 - 6 weeks for a nice, strong blend. Shake every few days to infuse the herbs into the liquid.


Final Notes:
  • When the time is completed, place a fine strainer over a glass bowl. Line the strainer with a piece of clean, lightweight cotton or muslin. Pour the contents through and strain. Your tincture is ready to use!
  • If you have a clean dropper bottle, then pour some of your tincture inside and add it into your medicine cabinet. The remaining jar of tincture can safely be stored in your pantry for up to 5 years if using vodka, 2 years if using the glycerin, while the apple cider vinegar tincture will last up to 1 year.
  • Make sure to label your final product with the name of tincture, date made and medium used (such as vodka, vinegar or glycerin).


Now remember, I am not an herbalist... but here is how I would take the tincture -- You can start off with one dropperful (aka 1/4 tsp.) for 3 times a day (if necessary, you may increase to a 2 dropperful dose which is 1/2 tsp. for 3 times a day) when the need arises. This can be added to water, tea, raw honey or even coffee (shh!!! well... if you are going to have it, a minty one would be more helpful).

Unlike caffeine which gives you a false burst of energy, these herbs give you a gentle boost because they are nourishing your depleted body. Keep in mind that the longer you use these herbs, the better the results will be as they begin to build and restore your energy. It is wonderful to have a variety of these long lasting and all natural medicines in your pantry!  Happy herbal-crafting!


"For the earth which drinketh in the rain that cometh oft upon it, and bringeth forth herbs meet for them by whom it is dressed, receiveth blessing from God..."
~ Hebrews 6:7

Disclaimers: I am not a certified herbalist but a homemaker interested in the arts of natural healing. The information I have learned has been gleaned through study of some of the following favorite books; Rosemary Gladstar's Medicinal Herbs: A Beginner's GuideHerbal Recipes for Vibrant HealthGrow Your Own Drugs by James WongThe Complete Illustrated Book of Herbs by Reader's Digest and websites of herbalists (such as the Bulk Herb Store Blog). As with all medicine, if problems still persist, discontinue the use of this remedy.

I am not a doctor. While I do seek scientific confirmation of the safety and effectiveness of the herbs and remedies I use, remember that using remedies is a personal decision. Nothing I say on this blog is approved by the FDA or intended to diagnose, treat or prevent disease. All things on this blog are my opinion or the opinion of others. Also, if you have a medical condition, are taking pharmaceutical drugs, or are pregnant, please consult your physician prior to taking herbs.


All the fine print. This post may be shared with some or all of the following link-ups: The Art of Home-Making MondaysModest Mom Monday'sMonday's MusingsMake Your Home Sing MondayGood Morning Mondays,  The Scoop, Tuesdays with a TwistRaising HomemakersWise Woman Link UpHomestead Blog Hop Wow Us Wednesdays,  Coffee and ConversationHomemaking ThursdaysHome Sweet HomeOur Simple HomesteadAwesome Life Friday Link Up and Create, Bake, Grow & Gather. Thank you lovely ladies for hosting these. This post may contain affiliate links (which are merchant links that help to support this site at no additional cost to you if you purchase an item through them).

Wednesday, January 18, 2017

DIY "Liquid Morphine" Topical Pain Reliever Essential Oil Blend Recipe


Today we are sharing an essential oil blend recipe from the Essential Oil 101 Guide and Recipe Book by Caroline Vencil ! What I like about this book is that she includes recipes for blends. Using the proper dilution method, your essential oils will last longer as well as achieve more surface space on the skin (making them more effective) when you utilize a carrier oil . 


Instead of paying for the pre-made expensive blends, she shares many useful make-your-own recipes such as an allergy blend, headache blends, fight the flu blend, tummy blend, etc. She also shares diffuser blends, pregnancy blends as well as many ideas for using essential oils in the home. Today I will be sharing her "Liquid Morphine" Blend (aka Topical Pain Reliever Essential Oil Blend).


DIY "Liquid Morphine"

Topical Pain Reliever Essential Oil Blend Recipe

(shared with permission by the author)

For convenience, place ingredients (in order given) directly into a 10 ml rollerball bottle. You could also recycle an essential oil bottle for this recipe but will need to adjust the ratio according to the size of the bottle (and you will want to make sure that the bottle you are using is compatible (property wise) with your recipe. For instance, don't re-use a chamomile oil bottle (which is a relaxant) for a "Get Energy" essential oil blend! :)


Add to 10ml bottle:
Note: There are some sources that think the oil blend might be too strong (specifically the lemongrass dosage), please read the comment section below for a varying opinion, options and an alternative recipe. I have shared what was printed in the Essential Oil Ebook but please use your own discretion. There are so many theories about safe usage of essential oils and we must all judge accordingly.


Fill the remainder of the bottle with the carrier oil of your choice such as fractionated coconut oil, almond oil, sunflower oil, etc. Make sure to cap the bottle tightly (especially if using the rollerball bottle) and your topical pain reliever blend is ready to use! For a quick label, use a sharpie and write the name of the blend directly on the glass bottle. 

All the fine print. This post may be shared with some or all of the following link-ups: The Art of Home-Making MondaysModest Mom Monday'sMonday's MusingsMake Your Home Sing MondayGood Morning Mondays,  The Scoop, Tuesdays with a TwistRaising HomemakersThe Homesteader HopWise Woman Link UpHomestead Blog Hop Wow Us Wednesdays,  Coffee and ConversationHomemaking ThursdaysHome Sweet HomeOur Simple HomesteadAwesome Life Friday Link UpFive Star Frou Frou Friday, and Shabbilicious Friday. Thank you lovely ladies for hosting these. This post may contain affiliate links (which are merchant links that help to support this site at no additional cost to you if you purchase an item through them).