Showing posts with label Gift Giving Ideas. Show all posts

Monday, September 12, 2022

Lavender Laundry Soap ~ Herbal Homemaking ~ Printable Recipe


"'Aye!' said Mrs. Purkis, smoothing down the bed,
and despatching Jenny for an armful of lavender-scented towels..."
~ Elizabeth Gaskell, North and South

It is okay to enjoy your life at home. It is okay to collect large, old jars because you think they’re pretty. It’s okay to decide to fill those jars with homemade sundries to add loveliness to your routine. It’s okay to want to beautify the ordinary to make it extraordinary. It’s okay to pour love, creativity and joy into your tasks. It’s okay to pour your heart into all areas of your home. 

You have permission to ignore everyone who tells you housework is mundane. It’s okay to make homemaking fun! As Mark Twain put it, “Find a job you enjoy doing, and you will never have to work a day in your life.”

Lavender Laundry Soap (a perfect recipe of loveliness): 

-- 1 c. grated bar soap *

-- 1 c. borax (found in laundry isle at Walmart)

-- 1 c. washing soda (found in laundry isle at Walmart)

-- 1/4 c. lavender buds

Optional: 10 drops lemon essential oil or your favorite (I use lemon as it is cleansing and the least expensive of all the oils!)

Pulverize ingredients in a blender or food processor until powdery.

* I used a plain coconut oil soap (which I found on my travels - it has no extra oils or fats in it and is therefore better suited for laundry) but you can also use Dr. Bronner’s bar soap and/or Kirk’s Castile Soap if you desire something natural. Calico and Twine sells a lovely laundry soap in her shop (which is also natural and made with coconut oil). I know many people use Fels Naphtha soap, Zote soap or even plain Ivory bar soap.

There are a myriad of recipes online you can experiment with. I’m sharing a basic recipe but with the addition of dried lavender to make it special. I have extra in my apothecary that I want to use up before it loses its potency. As lavender means “to wash”, what better herb to enjoy for our laundry?

Use 1 tbsp. for regular loads, 2 for larger loads. As it is low in suds, this recipe should be fine for HE machines. Just make sure all the lavender is pulverized!


You will find the printable recipe with labels HERE (my dear, sweet homemaking friend).

(Some of the links in this post are affiliate links which help support this blog. Thank you!)


Happily homemaking,
♡ JES

Wednesday, February 9, 2022

Easy Vanilla Rose Bath & Body DIY Recipes ~ Romantic Homemaking Series


"Ointment and perfume delight the heart..."
~ Proverbs 27:9a

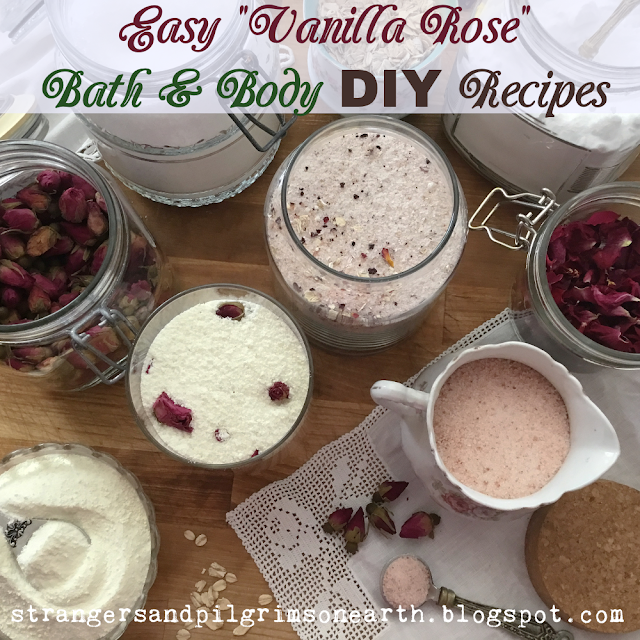
As February is often considered the month of "love", we continue again with our Romantic Homemaking Series. As evidenced by what has been shared thus far, it is fair to say that the rose is the star of the show. To me, they make everything special (but you can always substitute your favorite skin-safe flower in these products). When you integrate bits of beauty into your home rituals, life feels luxurious. A humble home can still prepare an aromatic bath for their loved ones, a refreshing scrub, a fresh perfume and so forth without hindering the budget. These sweet, little recipes can be adapted to whatever you have in your home (I've included mix and match ideas). Be creative with the resources you have and enjoy making up a romantic collection of bath and body recipes for all to enjoy! I also included some printable labels which would make for some lovely gifts too. Now, let's do some kitchen-crafting!

Relaxing Vanilla Rose Bath Salts

Basic Ingredients:

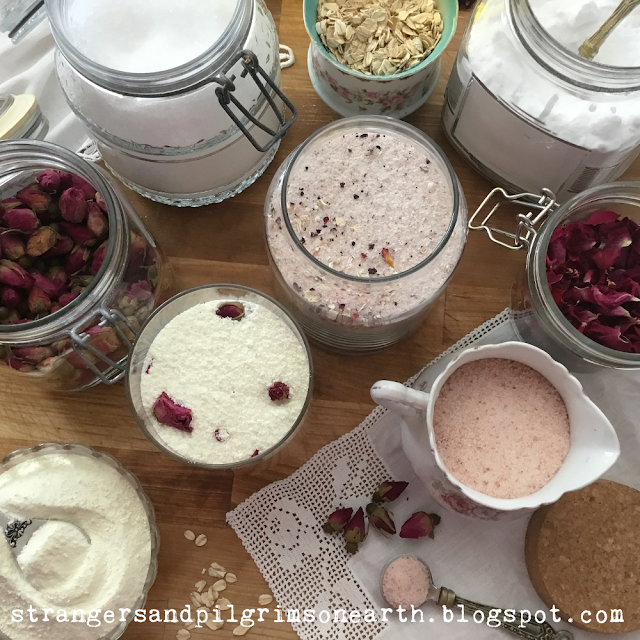
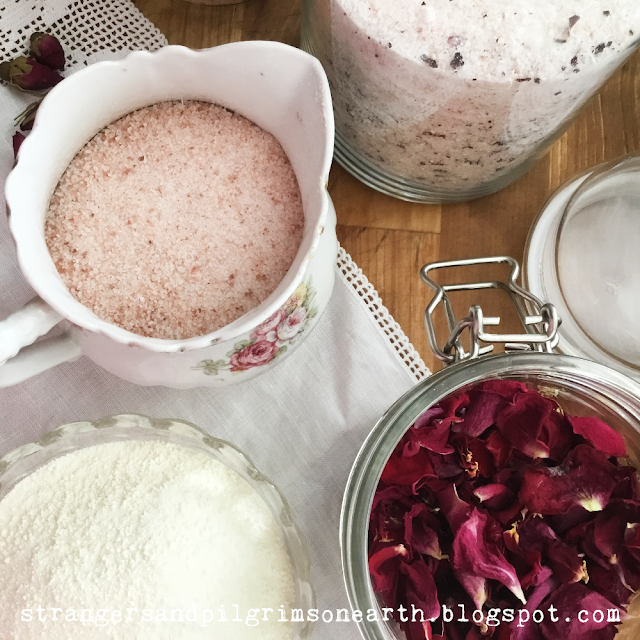
-- 1 c. pink salt, sea salt or Epsom salts

-- 1 c. pink salt, sea salt or Epsom salts (for more variety, use something different than what you chose above)

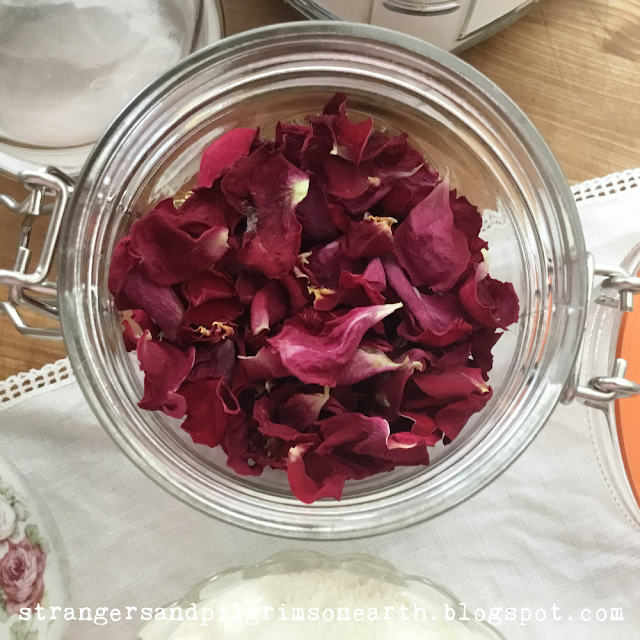
-- 1⁄4 c. dried rose petals (this is a great way to use up a bouquet you may have dried last year or you can use dried lavender, dried dandelion, dried calendula, dried violets, etc. If you don't have anything dried on hand, try adding in the contents of a few herbal tea bags!) 

-- 10 drops of vanilla essential oil  (or 2 tsp. vanilla extract)


Optional luxurious adds-in (mix and match in as much of these as you like):

-- 1/4 c. baking soda

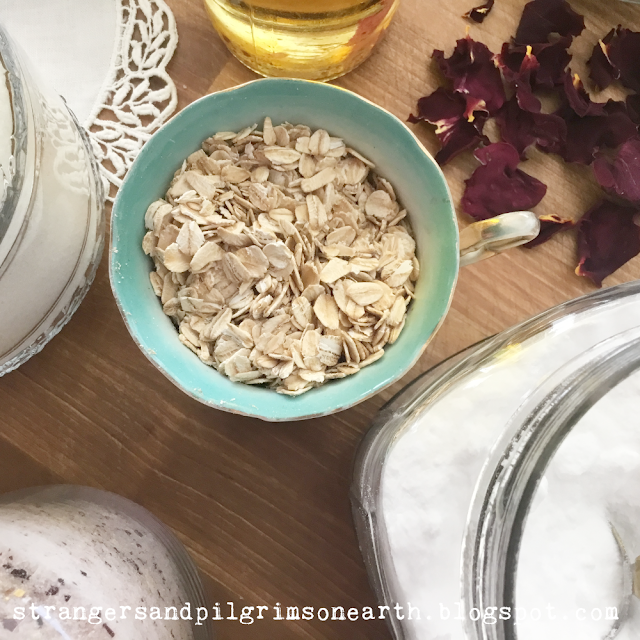
-- 1/4 c. oats

-- 1/4 c. powdered milk

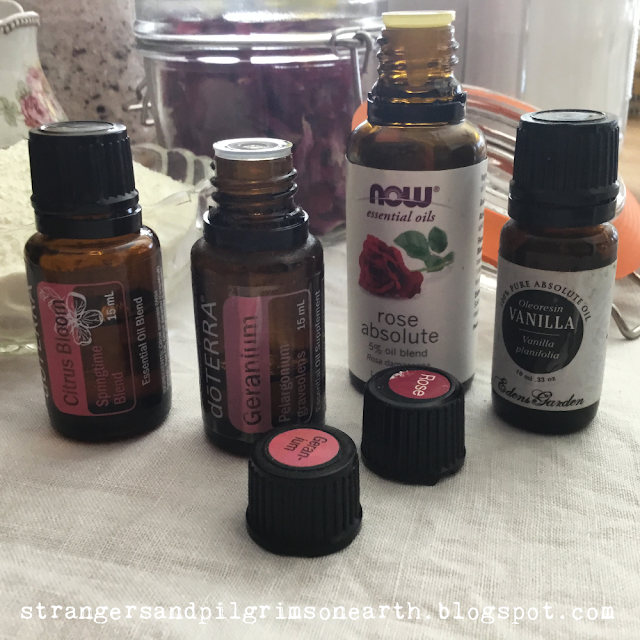
-- 10 drops of romantic fragrant essential oil (my choices are rose absolutepalmarosa essential oil or geranium essential oil -- please add in the drops cautiously and test the fragrance to your liking as you go. I generally use approximately 10 drops of essential oil per cup of product).


Directions:

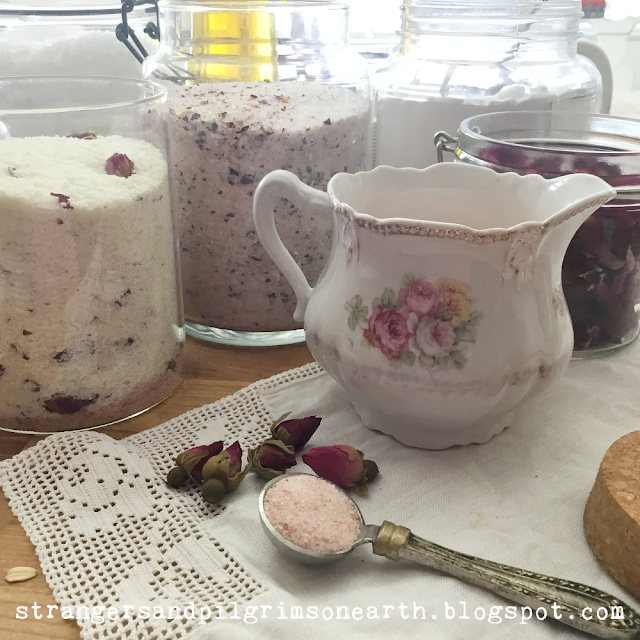
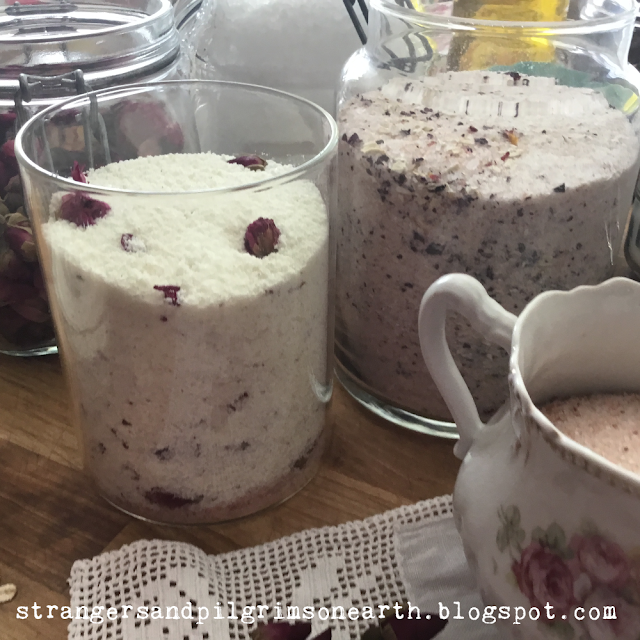
Blend all ingredients together (except for 1 cup of the pink salt if you are using it) until somewhat smooth (I like to keep a bit of roughage in mine for the more "raw" look). You may also want to add in a few whole petals to the final product to give it a prettier appearance.

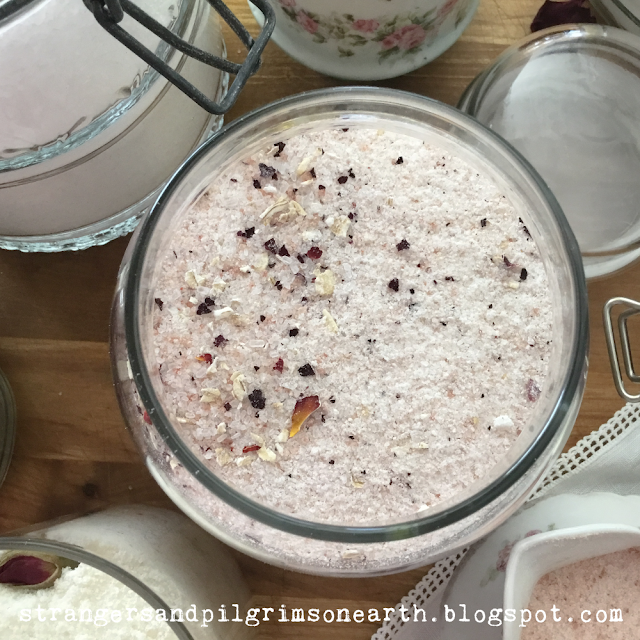
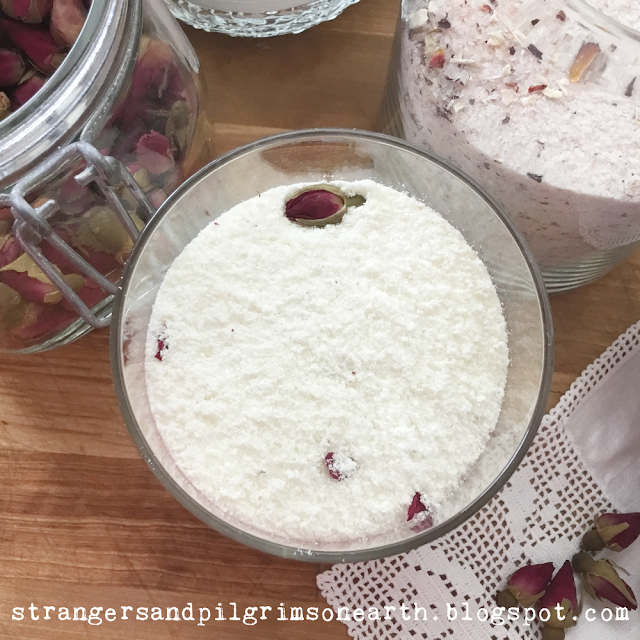
Mix and match different flavors and combinations to make different products! In the first bath salt photo, I focused more on pink salt and the different add-in's to get a rustic but romantic bath salt. In the second bath salt photo, I used more of a sea salt and powdered milk mixture (flecked with rose petals) to give the effect of a "rose milk" bath reminiscent of something sumptuous that Cleopatra might have bathed in. Be creative. It is so much fun! I can't tell you how amazing my kitchen smelled!

To use:

Add 1 cup of bath salts to the water while the tub is filling.

Moonlight Massage Oil (and/or Vanilla Rose Massage Oil) 

Ingredients:

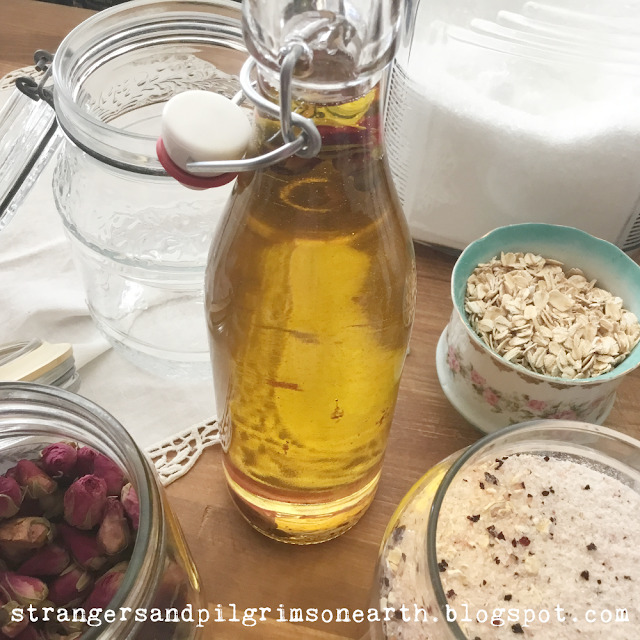
-- 1 c. mild oil (such as grapeseed, almond oil, jojoba, sunflower oil, avocado oil, etc)*

-- 10 drops of vanilla essential oil  (or 1 tsp. vanilla extract)

-- 10 drops of rose absolute (and/or a mixture of palmarosa essential oilgeranium essential oil, or you can use lavender essential oil or your favorite one)

* Alternatively, you can also use a infused oil in lieu of a plain one. Simply prepare a medicinal oil using rose petals instead of the lavender in the tutorial shared here. Or you can use the lavender and any other medicinal flower you like to make a pleasing blend. This is a great option if you don't have essential oils to work with.

Directions:

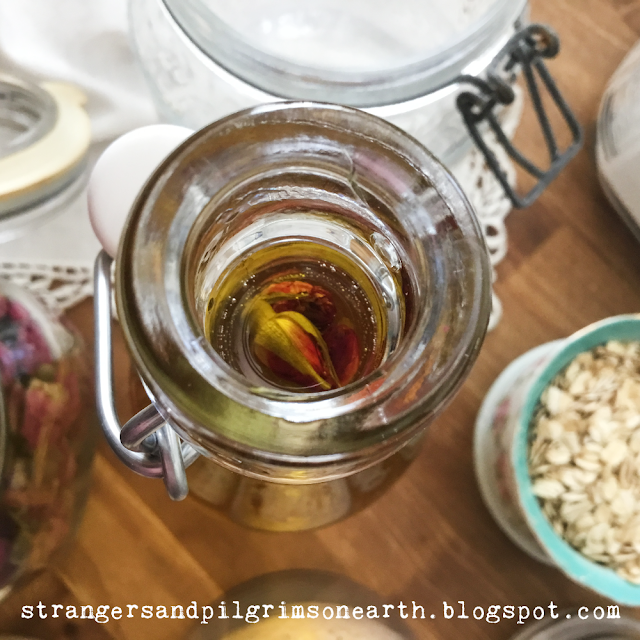
Mix ingredients together and place in a sterile glass bottle. You can add a few sprigs of dried rose buds (or other dried flowers) for embellishment.

To use:

Massage the oil into neck, shoulders and feet to sooth tension, relax muscles and stimulate healthy circulation.

Vanilla Rose Scrub

Ingredients:

-- 1/2 c. sea salt or sugar  (plus 1 to 2 tbsp. more to get desired consistency)

-- 1/4 pink salt (optional for romantic color, you can always use more sea salt or sugar)

-- 1/4 cup coconut oil (melted) (or almond oil, grapeseed, jojoba, sunflower oil, avocado oil, etc)

-- 1/4 cup almond oil (or grapeseed oil, jojoba, sunflower oil, avocado oil, etc)

-- 10 drops vanilla essential oil  (or 1 tsp. vanilla extract)

-- 1 tbsp. coarsely ground dried rose petals (once again, this is a great way to use up a bouquet you may have dried last year or you can use dried lavender, dried dandelion, dried calendula, dried violets, etc. If you don't have anything dried on hand, try adding in the contents of a few herbal tea bags!) 

Optional Mix-In's:

-- 5-10 drops of rose absolute (and/or a mixture of palmarosa essential oilgeranium essential oil, or you can use lavender essential oil or your favorite one)

Directions:

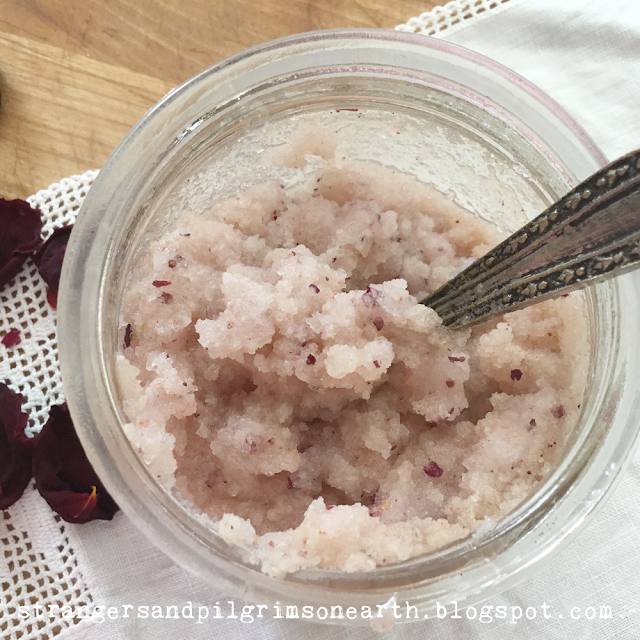
Stir ingredients together and pour into a small jar or container.

How to Use:

In the shower, massage a small handful of scrub all over wet skin (avoiding sensitive areas, concentrating on dry ones), rinse off and pat dry. Don't wipe away the oil feeling since this will keep you moisturized without applying lotion. Suggested use is once a week. Not recommended for your face. Be careful as the tub may become slippery when using.

Shelf life: Best if used within 6 months.

Comforting Rose Perfume 

(This recipe is courtesy of Mountain Rose Herbs and I am including it in case you happen to have many of these ingredients. I have made this in the past and replaced many essential oils with what I did have and created just as lovely of a perfume.)

Ingredients:

-- 3-4 organic whole rose buds
-- 4 mL sweet almond oil or other carrier oil of choice
-- 3 drops organic geranium essential oil or rose absolute
-- 2 drops Peru balsam essential oil
-- 1 drop organic frankincense essential oil
-- 1 drop organic sandalwood essential oil

Directions:

1. Insert whole flowers and/or other skin-safe dried botanicals into a 10 mL roll top bottle until it is at least half full.

2. Using a small funnel, fill the bottle with neutral-scented carrier oil of choice, leaving about 1/4 inch of space at top.

3. Add desired essential oil blend from choices above.

4. If space remains, top with carrier oil to fill bottle.

5. Snap roller ball lid onto bottle. Roll bottle between palms to evenly mix oils.

To Use:

Apply like you would any perfume ♥️ 


Also, these same oils were used in the tutorials for making these other items in case you want to maximize your use of them:


I used recycled jars and thrifted jars for this little project. No need to buy anything new!


And I also wanted to share a little story with you all... sharing a bit about "real life" romantic thoughts...

To put it plainly, we were dirt broke at the time.

But that didn't stop us.


We picked flowers from the prairie and dried them.


We then gathered the basics from our one treasury of wealth, our bulk pantry.

Pink salt, sea salt, sugar, oats, powdered milk and even baking soda. The vanilla extract, coconut and olive oil would also be useful.

And then we concocted.


We blended, we stirred, we added a bit of this and a bit of that until the combinations pleased us.

Soon there was an abundance of bath salts, body scrubs and nourishing bath and body oils!

And then the hot water was placed in the old enamel basin.

In came the homemade salts and the tired, sore feet.

They soaked.

Next a sugary scrub with coconut oil, flowers & other luxorious things. And the heels were rubbed until they were smooth.

The fresh water appeared and the feet were washed and dried with a warm, clean white towel.

But this moment was not over, an oil infused with floral scent was massaged into the skin until all the aches disappeared.

And now it is her turn.

Yes, we were living lean at that time but I never felt richer.

It’s not the amount of wealth one has that makes for a lovely life, but what one does with what one has which enriches it.

"The art of being happy lies in the power of
extracting happiness from common things."
~ Henry Ward Beecher

“He who is faithful in what is least
is faithful also in much…”
~ Luke 16:10a


These are some of the ways my daughter and I show love to one another. Genuine joy is not found in “self-care” but in the caring, sacred service we offer to each other.

You also might consider pampering your husband for a romantic evening with these relaxing spa rituals (he is in fact human too and would love to be treated so special!). You can even have fun with the children and make a little spa day at home. Teaching them to create moments of joy together in the home is a beautiful lesson in old fashioned contentment and teaches them how to appreciate and utilize what they have (resourcefulness).

Here is a PRINTABLE of the labels and a few quotes to include in your Inspired Home "Junk" Journal if you are preparing one. 

(I made a paper pocket and tucked my labels inside it. I also printed extras to have on hand for impromptu gifts.)

To make the labels waterproof, you can cover them with clear contact paper or thick clear mailing tape. Visit HERE to view all of the Romantic Homemaking Series to add a bit of whimsey to your domestic day.

Happily homemaking,
♡ JES

P.S. This post may contain affiliate links (which are merchant links that help to support this site at no additional cost to you if you purchase an item through them).

Monday, November 15, 2021

DIY All Purpose Floral Salve and Lovely Lip Gloss ~ Great Gifts


“If we allow our "high creativity" to remain alive, we will never be bored. We can pray, standing in line at the super market. Or we can be lost in awe at all the people around us, their lives full of glory and tragedy, and suddenly we will have the beginnings of a painting, a story, a song.” 
~ Madeleine L'Engle

There are times in a homemaker's life where she may feel stagnant and dull. Though this is far from true, I have found that living creatively and maintaining little projects along the way, add an immense amount of joy to the homemaking role. THERE IS NEVER TIME TO BE BORED! In this case, I have been looking at all my beautiful dried flowers with a desire to use them in a lovely way. This salve came to mind as all of these favorites are excellent medicinal herbs for women's skin care as well as quite aromatic for the feminine heart.  I’m excited to share this “ode to femininity” salve which will make for an all-purpose skin healer and lip gloss. I’ve named it my “floral salve”.  


To make this, I placed an equal amount of each of the following flowers to a clean jar (you can use any size jar you want in order to get the yield you want). Leave about 1 - 2 inches headspace at the top of the jar to leave room for the oil to cover the herbs. 

- 1 part of dried rose petals
- 1 part of dried chamomile
- 1 part of dried lavender buds
- 1 part of dried calendula

Next I poured in extra virgin olive oil (you can also use a good quality almond oil, sunflower oil, jojoba oil, coconut oil and/or grape-seed oil).  Cover the flowers in the oil by at least 1-2 inches (making sure they are completely submerged the entire time. To keep the herbs covered, I usually shake the jar once a day or so). 

This is a very flexible recipe and I encourage you to use what you have. If your apothecary has lavender and chamomile, just use those. With the addition of essential oils at the end, you will still have a fine and worthy salve! I am the queen of making do and I encourage you to do the same if necessary (during certain times in my budget, it is necessary). 


Screw the lid on firmly and let the mixture steep in a warm, sunny spot for 2 - 3 weeks (you can cover the jar of oil with a light cloth if you want to avoid direct sunlight). I usually place my infusions on my kitchen sill. When the time is up, strain the solids through a fine cheesecloth or a piece of thin cotton/muslin to remove all particles. I found that double straining with a second time through cotton works best. Pour into a clean, dry jar and measure out the amount of oil you have.


In a double boiler, gently heat your (measured out) floral infused oil for a few minutes.

(To bypass excess clean up, save up some of your discarded canned food tins to make a disposable double boiler (that means you don't need to clean up the wax residue after - you just toss your can!). Just add a few inches of water into a sauce pan and place your clean can inside. Add the wax to the can and you have a makeshift double boiler!)


Add in 1/4 c. of beeswax for every 1 cup of oil you measured (you can also add in some shea butter at this point for extra moisturizing abilities).


Stir occasionally until everything is gently melted together. I use a wooden skewer to stir so that it can be thrown away after for easy clean up.Remove your mixture from heat.  I divided my mixture in half at this point so that I could do half as all-purpose skin salves and half as tinted lip glosses. 

*Now is also the time to add in some coloring if you would like to make a tinted lip gloss that is shown in the pictures. It isn't necessary to add in the color, but it is fun. Once your beeswax and oil solution is melted, simply add in some lipstick (there is no ratio to this, just go by sight). I used an all-natural lipstick color that my daughter purchased which was too dark for her. Once it was added to the solution, it was a beautiful hue. But to be honest, it is very light on the lips (so don't expect a dark color, it is a lovely light gloss). This is also a great way to use up the bottom of the lipstick tube if you are a lipstick wearer. Just go in there with a toothpick or something to remove the excess and melt it into the warm solution. I used a whole tube of lipstick for one cup of floral oil. 


Once your mixture is removed from heat, stir it a bit to cool it off as you don't want to add the essential oils to a hot mixture (it will evaporate the oils). But you don't want it too cooled off as the oil mixture will start to set into a salve (if this happens, just warm it up again)!
 
Now -- stir in the essential oils. For the basic salve recipe I would add 10 drops of your favorite floral essential oil to every cup of your infused oil to give it a stronger potency of medicinal benefits and a longer shelf life.

For instance, I had a yield of 2 cups of oil. I used the following essential oils which are excellent for our skin:

- 5 drops of lavender essential oil
- 5 drops of chamomile essential oil
- 5 drops of geranium essential oil
- 5 drops of rose absolute (you can use rose essential oil if you have the luxury or Palmarosa essential oil)

This equals 20 drops of oil - AKA -  10 drops of essential oil for every cup of floral oil used.


I usually stir the solution for another minute before pouring the warm liquid into lip gloss tins (0.5 ounce), salve tins (1.0 ounces), small canning jars or even recycled baby food jars. The salve will firm up within the hour or so.


This all-purpose skin salve can be used for many concerns such as bites, burns, stings, rashes, cuts, inflammation, chapped skin, wounds and/or dry skin conditions. It should last for six months to one year if stored in a cool, dark location. The lip gloss can simply be used as a lip moisturizer. I think these would also make lovely gifts for the sweet women in your life.

Happy herbal homemaking! 

❤ JES


Monday, October 25, 2021

September 2021 Homemaking Newsletter (Autumn Nesting)


“I was brought up to believe in the modern myth that housekeeping is only drudgery, and the housewife is a downtrodden martyr. I thought that any seemingly contented housewives were only ‘making the best of it.’ When I first began housekeeping in my own home, I felt that I had entered the ranks of the mistreated.

After a time I began to realize, to my amazement, that I didn’t feel at all downtrodden, and that I was thoroughly enjoying myself. I began to look at other domestic ‘martyrs’ from a new angle, and I have learned many things.

I have found that there is romance in housework: and charm in it; and whimsy and humor without end. I have found that the housewife works hard, of course–but likes it. Most people who amount to anything do work hard, at whatever their job happens to be. The housewife’s job is home-making, and she is, in fact, ‘making the best of it’; making the best of it by bringing patience and loving care to her work; sympathy and understanding to her family; making the best of it by seeing all the fun in the day’s incidents and human relationships.

The housewife realizes that home-making is an investment in happiness. It pays everyone enormous dividends. There are huge compensations for the actual labor involved…

There are unhappy housewives, of course. But there are unhappy stenographers and editresses and concert singers. The housewife whose songs I sing as I go about my work, is the one who likes her job.”

~ Marjorie Kinnan Rawlings

“Whatsoever thy hand findeth to do, do it with thy might…”
~ Ecclesiastes 9:10a

Greetings gentle reader! I've been homemaking with all my heart because He said to. Do you join me in the Titus 2 forces? If so, perhaps you would care to read along in another monthly update in which we chat about books read, things watched, homemaking projects and any other ponderings which do not fit into its own post. It is simply an old-fashioned homemaking newsletter. 


As we enter fall, we did our final preserving of "meat in the summer”...

I’ve processed 14 pints of freshly-caught-by-husband, bluefin-tuna. I pressure canned it with homegrown jalapeños, Himalayan pink salt, freshly ground pepper and topped the jars with olive oil. I can’t wait to open that first lid… HERE is the instructions for pressure canning the tuna that I used.

"There be four things which are little upon the earth
but they are exceeding wise:
The ants are a people not strong,
yet they prepare their meat in the summer…"
~ Proverbs 30:24-25


Sometimes a quiet morning spent measuring, pouring and packaging is tender therapy for all the loud things of this world. When you infuse this time with prayer, it can be powerful therapy. 

I’ve made these botanical perfumes as gifts for some lovely women in our church. I call them "relaxing rose perfumes". 

To prepare this all-natural essential oil blend, place 3 tiny dried rose buds inside a 10 ml glass roll-on bottle. Add 2 tsp. almond oil (or carrier oil of choice), 3 drops of geranium essential oil, 2 drops of Peru balsam essential oil, 1 drop of lavender (or frankincense) essential oil and 1 drop of sandalwood (or patchouli) essential oil. Top off the bottle with more carrier oil if necessary. Put on roller cap/lid and shake well. Your “relaxing rose” perfume is ready to use!

And now, you have also successfully bottled up some lovely aroma-therapy!


I've also begun infusing some of my favorite flowers in olive oil to make a lovely, floral, feminine salve. Here is the tutorial. These too, make lovely gifts!


As you can see, as the garden dwindled down, I became involved in many herbal homemaking projects. These prairie candles were so enjoyable to make and I shared the tutorial HERE in case you are interested. 


I've also been enjoying some autumn nesting… There are many methods to embracing the change of seasons in the home. It is probably one of the most enjoyable of the homemaking arts! My preference is in embellishing with everyday “replacements”. I’ve been a little squirrel packing away fall treasures in anticipation of my favorite season. Here is how I’m infusing autumn into our home:

- I’ll be replacing my every day dishes with this thrift-store “curated” collection of plates in browns, yellows & oranges. There are four different designs but I think they “match” beautifully.

- The cottage printed plate will replace a summery rose plate I have hanging on the wall. This will bring “warmth“ into the kitchen (shown in action on second-to-last picture on this post).

- I’ve collected a few secondhand baking dishes at thrift stores in browns. I will be using these to serve our meals. One is a vintage Pyrex & the other is a brown glass dish which came in a sweet custom-sized wicker serving basket!

- I have brought out my beeswax tapers & brass candlestick holders to enjoy once again.

- I’ve saved our butternut squash harvest to make our favorite soup come October. In the meantime, they are a lovely seasonal centerpiece.

- I will now be using the autumn inspired no-sew “prairie napkins” I made (shared below). It’s always fun to introduce new linens into the fold.

- I’ll be removing the white summer linen sheets and bedding and replacing them with a darker print sheet set and heavier down duvet.

- And lastly, I placed all my autumn inspired (thrifted) fabrics in a basket in order to prepare some projects for the home (this is written for accountability 😉). I had recently done a deep cleaning with some reorganizing. When I went through my closet, I saw all the secondhand sheets & flannels I found for great prices. But it isn’t great when it becomes clutter! Therefore, this will be my seasonal sewing basket (now you are my witnesses). I must produce!

What are your cozy home plans?


I repurposed another thrifted vintage fitted sheet into a set of “autumn prairie” napkins (without sewing)... I’m in love with this “snip-and-rip” process! I had made a set for spring and have used them constantly. I can’t wait to bring in the “new” fall collection. It’s so enjoyable to prepare handcrafted items for your home each season (especially when it costs next to nothing).

When I had purchased the secondhand sheet set, I really only wanted the flat sheet (I’ll share that project once finished) but since the fitted sheet came with it, I was obligated to put it to use (it’s in my frugal OCD nature 😉).

This set of napkins took me five minutes to measure and rip-to-size along with a slow evening spent pulling off excess threads. 

A step-by-step tutorial is shared HERE if you are interested.

These simple napkins give me such pleasure! To turn something obsolete into something useful plain gives me the happy homemaking chills ✨ have you felt that thrill I’m speaking of? when you repurpose little items to embellish your home life?

When purchasing something brand new and mass-produced, there is truly no comparison to the joy one gets from creating something from a castaway nothing.

“…it was not what one had that was important,
but what one made.” 
~ Elizabeth Goudge


I have also been baking up a storm. It seems like the moment the seasons change is the moment that oven becomes alive again after the heat of summer. I always double the recipe for my cookies and freeze the extra for impromptu company. It comes in so handy! 

“It is true that all men are created in the image of God, but Christians are supposed to be conscious of that fact, and being conscious of it should recognize the importance of living artistically, aesthetically, and creatively, as creative creatures of the Creator. If we have been created in the image of an Artist, then we should look for expressions of artistry, and be sensitive to beauty, responsive to what has been created for us.” 
~ Edith Schaeffer

Perhaps this explains my love for pretty plates, lace curtains and dainty linens. It is a practical form of homemaking art that we can adorn our homes with. Why limit beauty to just paintings and portraits on the walls? Some of us like to sprinkle it into all our little tasks and rituals as a daily act of love. With the existence of thrift stores, it is possible to be a domestic artist in even the leanest of household budgets.

“He who is faithful in what is least is faithful also in much…”
~ Luke 16:10

Pictured: freshly baked oatmeal chocolate chip cookies (another work of homemaking art ☺️).


As far as books and movies go, my daughter and I have been on a fall frenzy and cozied up with popcorn and rented a Hallmark film called "Autumn Dreams". It was sweet and everything you expect in a Hallmark movie. We've also been reading lots of old home decoration books that we have found thrifting. It truly is a time for nesting. 

P.S. I added some new labels in our Etsy shop this month! These dainty calico printed labels are 2.5 inches (and are waterproof and removable) and could be used in so many ways: pantry labels, canning labels, homemade product labels, crafting labels, etc. Just wanted to share!

Pictured below: "Autumn nesting"... the replacement of that one “cottage” plate on the wall turns summer into cozy fall… 


Dearest homemaker, 

Now more than ever, the home needs to be a place of peace. Perhaps even a place of Aw and wonder as we face such ugliness in the world. The home should feel safe, comforting and most importantly, sacred. That each person who enters knows they have entered a refuge from the current reality. It is the way to show our children that THIS is what is “normal” and good. That there is so much difference in these walls from the world’s that their souls will instinctively know that God resides here and they will have a strong desire to be here also.

"My people will dwell in a peaceful habitation,
In secure dwellings, and in quiet resting places..."
~ Isaiah 32:18


With that being said, what about you dear reader? What wholesome and lovely things have you been reading, watching and/or working on? As always, recommendations are much appreciated as hearing about your homemaking endeavors always inspires me! Also, I have been having trouble with my links. If you decide to click on any of them, would you mind letting me know if they are proper (in other words, do you find you end up where you expect to)? I am trying to troubleshoot this... but in the meantime I'm...

Happily homemaking,
♡ JES


(Some of the links in this post are affiliate links which help support this blog. Thank you!)

Thursday, September 9, 2021

DIY Prairie Candles & The Seasons of Homemaking


In answer to “will you be going to work now that you’ve finished homeschooling your family and/or what will you do all day?”

This kind of stuff sometimes... 

the projects you always wanted to try but never had the time. Now is the time. 

That is the beauty of homemaking, there are so many enchanting seasons.


To begin, I prepared a make shift double boiler with a large coffee can.  This bypasses excess clean up as you can dispose of the waxy can afterwards with no remorse and zero extra work. Just add a few inches of water into a sauce pan and place your clean can inside. Add the wax of choice to the can and slowly melt it down (and you have a makeshift double boiler)! I would recommend using either beeswax pellets or soy wax pellets as they are both clean burning (aka non-toxic). Beeswax would be ideal as it has its own clean scent! However, it is quite expensive. I used the remaining soy wax from the last project making herbal wax sachets for these candles. (Some of the links in this post may be affiliate links meaning I earn a small percentage from any purchases).

It begins in your birth home, making your bedroom the place of your dreams ✨ 

As you age, you begin suggesting changes in the entire home (and mother smiles knowing you yearn for a nest of your own).

Finally, you arrive at the doorstep of said domain and desire to make it cozy and comfy for you and dear husband.


To make the "prairie candle" pretty, using a hot glue gun, glue a few dried flowers and leaves to the side of the chosen vessel. I used roses, calendula and the hydrangea and eucalyptus leaves I had dried myself. There is no rhyme or reason, the rustic look is completely acceptable here. I didn't put too much as I wasn't sure of the outcome once the candle started burning. Plus, I didn't want them to become a fire hazard. (Also, it would be wise to line the counter with newspaper or paper bags to make clean up convenient.) Edited to add - See fire hazard warning in comments. 

And then it begins to feel empty and you yearn to fill it with chubby little faces.

If God grants you that desire, the home becomes a training ground for the future Christian generation. It is a time of hard work, physically challenging while mentally challenging your patience and nerves (giving you growth). 
 
For some, the home education process begins and feels like it will last forever. You are tempted to rush through thinking it will never end and at the same time so sad knowing it someday will. 


Next, using a hot glue gun, glue the candle wick in place (centered). My candle wicks came with the bulk soy wax but you can purchase them separately. 

But please don’t hurry.

Because one day, it’s all over! 

Just like that! And here you are, making little prairie candles all by yourself.


Once the wick is in place, use a clothespin to frugally center your wick. They also sell fancy candle apparatus for this but my kit only came with two so I resorted to the handy clothespin for help. 

The rush won’t change the movement of time but it may affect the family memories.

I encourage you to slowly enjoy each season of womanhood. For the day will come when you will have the time and when you see those sweet young “struggling” families (like yours may feel like right now) and you will miss it!

In the meantime dear homemaker, let’s continue to create beauty in all our different stages.


Once my wax was melted down, I removed it from the double boiler and added in about 1/3 of it's volume in coconut oil. I was trying to stretch the candles a bit further. And once it was a bit cooler, I added in some essential oil for scent (I used some inexpensive ones I found on clearance). There is a science to this (ratio) but I'm not much of a scientist so I dumped in what I thought was adequate and called it a day. But if you'd like to be more "professional", you can research the ratio on candle making websites. 

For me (an almost empty nester), it may include creative homemaking projects, visiting/helping a new mother, administering to the sick, spending time with aging parents, learning new skills, getting more involved in the church, etc.


Once the candle cools, you can trim the wick down to 1/4" and they are finished. 

And while doing these things, our adult children see the variety and industry of home life and will carry beautiful feelings of home in their heart and into the homes they will one day have of their own.


As far as the containers go, I used a set of six thrifted etched glasses in the pictures above as I loved the look of them. Unfortunately the etch-work didn't show through that well. 


You can also use recycled jars which I did for the rest of them (see picture above) or recycled tin cans from canned goods (you can wallpaper the can with pretty paper after) or you can also use random tea-cups and so forth. The options are limitless. I can't wait to burn them come autumn and winter!

But remember, never leave candles unattended while burning... 🔥 


In these ways, the homemaker is never obsolete. She is valuable in every season. I will be a keeper at home forever.