Showing posts with label Recipe Cards: Food Storage. Show all posts

Thursday, January 5, 2023

Preserving Orange Gem Jelly, Discards and Delighting in the Light

"A man ought to carry himself in the world as an orange tree would if it could walk up and down in the garden, swinging perfume from every little censer it holds up to the air."
~ Henry Ward Beecher

I love to work with citrus in the winter. Not only is it tasty and refreshing and full of the necessary vitamin C, but bright and beautiful in the somber chilly background of the season. Preserving food in jars is also very welcoming in this weather as the warmth canning brings into the kitchen is much appreciated. Plus, adding extra jars to the pantry shelf is indeed lovely too. Would you care to join me in preserving some delicious orange gem jelly? As the name suggests, it is reminiscent of those "Sunkist" sugared orange gem candies I loved as a child. Plus, it is quite simple to make.


Ingredients: 
  • 2 c. freshly squeezed, strained orange juice (from approx. 5-6 oranges) 
  • 1/3 c. freshly squeezed, strained lemon juice (from approx. 2 lemons) 
  • 2/3 c. water 
  • 6 tbsp. pectin (I buy it in bulk HERE or 1 box of Sure Jell)
  • long strip of orange peel (from oranges used above) 
  • 3 c. sugar (I use organic from Costco)

Directions:

Place the strained orange juice, lemon juice and water in a large cooking pot. Drop in the orange peel. Stir in the pectin until dissolved and bring to a boil (stirring frequently). Once liquid reaches a rolling boil that cannot be stirred down, then add in the sugar and bring to another rolling boil (stirring frequently). Once liquid reaches another rolling boil, let it boil for one minute longer while stirring constantly so it doesn’t overflow. Remove from heat. Using tongs, remove strip of orange peel and discard. Skim off any foam quickly and ladle jelly into hot, sterilized half-pint (or quarter-pint) jars leaving 1/4-inch headspace. Wipe rim of jars with a dampened clean towel; adjust two-piece metal canning lids. Process for 5 minutes in a boiling water canner. Remove jars and cool (out of the way of any drafts) on a kitchen towel once processing time is complete. 


Wait for 12 hours and then you may store your lovely jelly in the pantry.

Yield: 4 half-pint jars (or 8 1/4-pint jars)

Note: This recipe has been adapted from the “National Center for Food Preservation” website.


You will find the printable version of this recipe HERE should you like to add it to your "Preserving Notebook"


Though I was gifted one small basket of homegrown oranges, I was able to preserve so much from them! 

This was all produced for our home from the free basket of organic, homegrown oranges (last year). I thought it would be fun to include ways you can use up every last bit of this refreshing citrus fruit (no discards here!):

- 8 quarter-pint jars of orange gem jelly (recipe shared HERE)

- 8 half-pint jars of macerated marmalade (this was an experiment and a failure at that so I'm definitely not going to share this recipe!)


- 3 dehydrator trays dried zest (which I removed from the oranges before making the jelly - for medicinals, cooking, baking, DIY products, etc.)

- 1 dehydrator tray dried orange slices (to be used in tea blends, infusing large jars of sun tea, potpourri, garnish and my newest idea of placing under roasting poultry to impart flavor)


- a few quart jars of orange peel vinegar for making cleaning products.

- jar of orange peel ends for the freezer (when I save enough I will make pectin with them) The ends can also be used to make many other things - visit my ebook for 100+ ways to use fruit scraps for more ideas.


- 3 orange roses (for fun! - to embellish orange cakes, etc.) (The tutorial is also shared in my ebook - 100+ ways to use fruit scraps.)

And finally, you get to place all your resourceful homemade items on your pantry shelf just like Ma Ingalls would have done! 


“The sunshine came streaming through the windows into the house, and everything was so neat and pretty. The table was covered with a red cloth, and the cookstove was polished shining black. Through the bedroom door Laura could see the trundle bed in its place under the big bed. The pantry door stood wide open, giving the sight and smell of goodies on the shelves, and Black Susan came purring down the stairs from the attic, where she had been taking a nap."
~ Laura Ingalls Wilder, Little House in the Big Woods

I think the joy one gets from reading these pioneering classics is the ability to see the beauty in the ordinary. While the darkness seems to be looming in so many areas of life, these books (and Scripture - read Phil 4:8) remind us to glorify in the basic but beautiful blessings.  To enjoy the heavenly gifts...

Sunshine, the chirping of the birds, the early luscious spring growth and the aroma of wet earth, the cozy kitchen with the curtains flowing in the breeze, the smell of a newborn child, the smile from a toddler, the embrace from a child, the laughter shared with a teen, the steadfastness of a husband’s love, the eternal promises from Above.

Dearest reader, though it is winter, let us remember to delight in the Light.

“Then Jesus spoke to them again, saying,
"I am the light of the world.
He who follows Me shall not walk in darkness,
but have the light of life."
~ John 8:12

I hope you enjoyed today's winter preservation post with a touch of simple pioneer nostalgia. It is raining this morning and the sound of the pitter-patter is so gentle and soothing. I'm looking forward to beginning my nesting for the day. Happy homemaking! Love, JES

Friday, September 16, 2022

How to Make a "Homespun" Preserving Notebook

“There was no rest and no play for anyone now. They all worked from candle-light to candle-light. Mother and the girls were making cucumber pickles, green tomato pickles, and watermelon rind pickles; they were drying corn and apples, and making preserves. Everything must be saved, nothing wasted of all the summer’s bounty.”
~ Laura Ingalls Wilder, Farmer Boy

I used to keep my canning recipes in my recipe book but the more recipes I accumulated, the less space I had for the seasonal canning ones. Then I switched them to my herbal but that also grew in size. This summer, I began gathering all my canning notes, recipes, etc., and placing them in their own dedicated binder. I call it my "Preserving Notebook".

After much deliberation (yes I think hard on such things 🤓), I decided to use alphabet tabs (affiliate link) to organize everything. That way, any canning recipe would have a home alphabetically. Apple recipes would go under “A”, blueberry recipes under "B", strawberry recipes under “S” and so forth. I also inserted a few other things that are useful to my preserving needs.

Here is what I included in my notebook:

(These first few items I keep in the beginning of the binder, prior to the tabs since they don't fit a certain "produce" theme. I consider them informational.)

- my food preservation planner pages (free printable here) In the autumn and winter months, as I go through my canning books, I make note on the recipes I would like to try. I input the recipe, book and page number in my planner pages. That way, when the season hits, I already know what I want to make with a certain fruit or vegetable. It is very useful. 

- pressure canning instructions (I don’t do it enough to rely on my memory so these steps are helpful and always conveniently located) I keep these at the front of the index tabs and have it covered in plastic as I take these in and out more. I copied these directions from The Prairie Homestead where she gives a great in-depth tutorial on how to use a pressure canner. Here is the link in case you are interested.

- pressure canning vegetable and meat charts (with time and pressure amounts) These I photocopied from the pressure canner manual (not shown).

- preserving articles I read from the canning authorities and find useful (such as “how to can without sugar or salt”, etc.) Here is the link in case you are interested in this particular one.


(The remaining items I insert in the tabbed section according to the alphabetical order of the produce I am preserving.)

- photocopies of my favorite recipes from my canning books (this way I don’t have to search them out), any handwritten recipes and so forth. Of course, these are placed alphabetically by "produce".

- themed recipe articles from State extension offices (they’ll have printable pages on how to preserve foraged fruits, etc., and list various preserving ideas and recipes which are very handy - here is a sample of the foraged fruit and here is the how to preserve peppers booklet that I included as well)

- individual preserving recipes I print from websites (once again these are placed in alphabetical order according to what is being preserved) Here is the apple pie filling recipe I use. I did do some fall decorating on the page as it was a little bland :)

- fruit leather recipe (here is the one I printed out from Chocolate Box Cottage) Something like this I would file under "F" for "fruit" in general.

- any food preservation recipes in general (including freezer jam recipes, fermenting recipes, dehydrating, etc.) Here are a few from my blog which may be printed for your notebook:

(All my food preservation tutorials are shared HERE but all do not include printable recipes.)

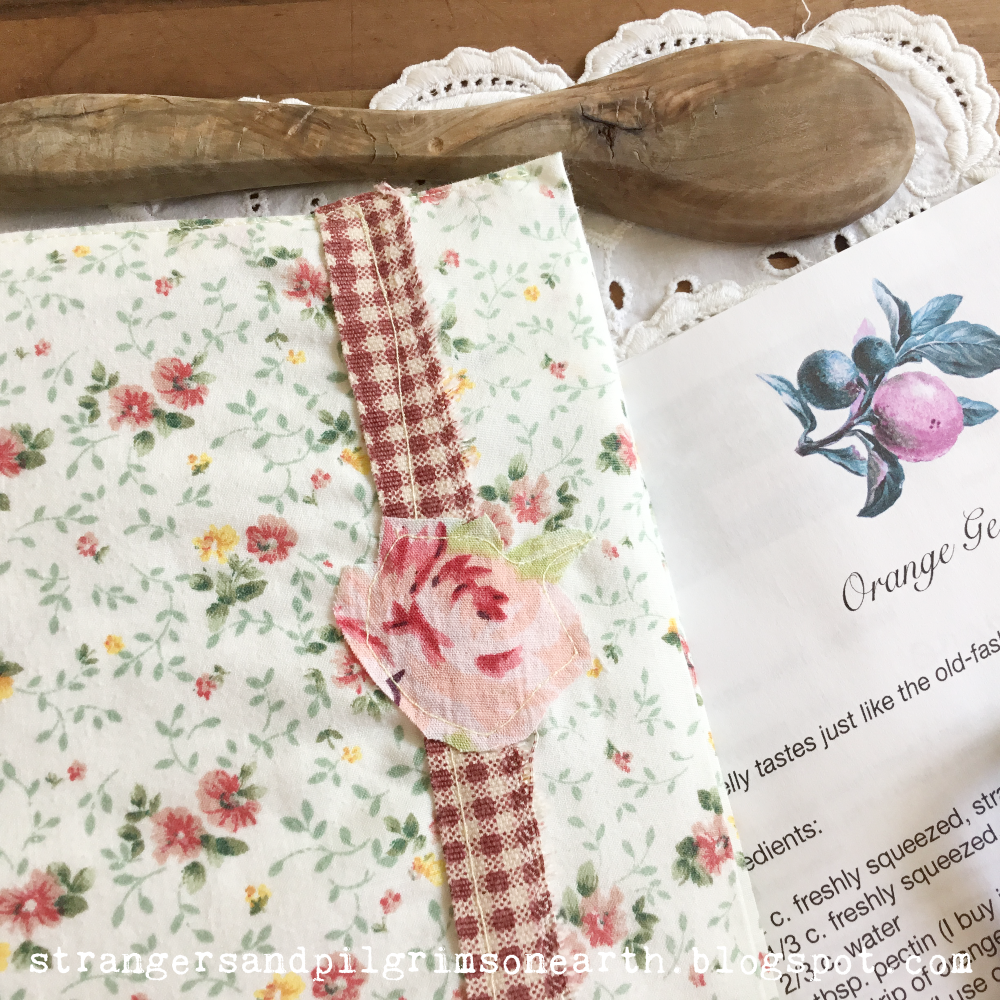
To add interest, I covered my notebook with a floral fabric to give it a cozy feeling. I am quite embarrassed to show this up close as I am not a great seamstress and quite an impatient one. I just used the remnant fabric from an old sheet (which had lots of piling but was still a cute print). I used the remnant gingham border from another project as ribbon (it still had a frayed side but I thought it added to the charm). Next, I cut off a rose from a retired duster-housedress and used that as a little embellishment. I also added a strip of lace to the back cover for more interest (pictured below).  I made the cover in the same way we used to have to cover our school books but used fabric instead of a paper bag. And I used a sewing machine instead of tape. It took 10 minutes to make because I obviously did it quickly (to be honest, I was supposed to be doing something else that day and I was feeling quite guilty for making this!).

I’ll be fine-tuning my binder over autumn as our garden has faded and I’ll have extra time to work on such projects. In fact, as I was typing this up, I thought I would add a food dehydration chart to this. I am always looking up the degrees and length of time for each piece of produce and it would be nice to have it handy here.

This project cost me a total of $3.76 because I had to purchase the alphabet tabs. Everything else was used from foraged materials around the house. This is a great way to use an old, ugly binder since you can cover it. Do you think you would ever make something like this? How do you store and keep track of your food preservation recipes? Is there anything else you would place in this binder? Please share!

Happy homemaking,

♡ JES


Thursday, June 23, 2022

How to Make Simple Strawberry Freezer Jam ~ Printable Recipe

One of the first things I learned how to preserve as a newlywed was strawberry freezer jam. It doesn't require any fancy equipment or any complicated skill but it surely blessed the whole family every time I served buttery toast, pancakes, waffles or crepes. And yes, it is also amazing over ice cream or plain cheesecake in case you were wondering. While I have since learned to can my own jams, I still make a few batches of strawberry freezer jam each year because the fresh flavor of this raw jam is insurmountable.

There are two ways to make it! You can either buy the specialized  "freezer jam pectin" in the store which are quite pricey or you can make your own with regular pectin. Being I purchase my pectin in bulk, this is the more affordable route and the one I am sharing today.

Ingredients:

  • 2 cups crushed strawberries
  • 2 cups sugar
  • 2 tbsp. bottled lemon juice (you can most likely use freshly squeezed juice as well)
  • 1 cup cold water

To begin, clean strawberries and crush them. You can use any method you like. You can put them in the food processor, the blender or you can smash them in a shallow pan the old fashioned way. I have tried all the various ways depending on my time constraints and I did find that the old fashioned way does yield a bit more of a desirable consistency. However, the difference isn't too much that I wouldn't still do the other quicker options. It really depends on my mood at the moment and what I have going on.

This recipe can be halved but not necessarily doubled. Please keep in mind that freezer jam is best done in small batches for best results. 

So, for every 2 cups of crushed strawberries, add 2 cups of sugar and 2 tablespoons of lemon juice. 

Let it stand for 20 - 30 minutes to draw out the juices. 

Next, put one package of powdered fruit pectin (or 6 tbsp. bulk pectin) in a small saucepan with one cup of cold water and stir to dissolve. Continue to stir to blend in the pectin while bringing the mixture to a boil. Once it hits a rolling boil, boil for exactly one minute.

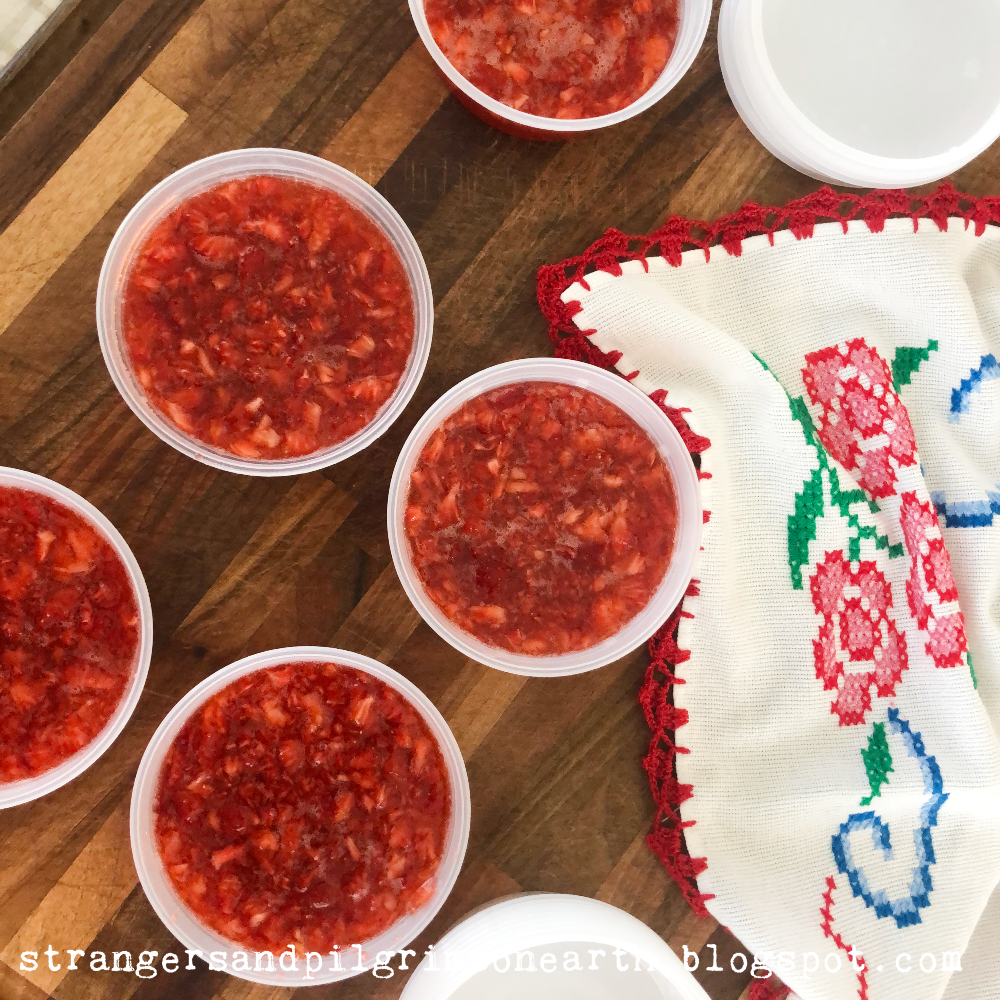
Pour the pectin mixture into the fruit and stir thoroughly for 2 minutes. Ladle into clean containers (I used these -- affiliate link) and let stand for 30 minutes. This recipe should yield approx. 5 half-pints and/or 5 cups. 

Label and date your delicious jam!

Once that is accomplished, I like to place the jam in the refrigerator for 24 hours to set prior to freezing. 

You can store some in the refrigerator to use directly and/or place the remaining in the freezer for future enjoyment. For best results, use within a year.

Note: these floral, freezer-friendly labels are found HERE in my Etsy Shop!

While freezer jam doesn't have the same thick consistency as cooked jam, the nice syrupy consistency is most welcome on those delicious foods described above. This is a summer staple in our home and a seasonal part of my homemaking routine. I must make strawberry freezer jam each June!

You will find the printable recipe HERE ♥️

You may also be interested in visiting our other strawberry patch of posts for more strawberry ideas!

Happy homemaking,
♡ JES


Thursday, June 17, 2021

DIY~ How to Make & Can Fruit Syrups & Jelly {From Discarded Peels & Pieces} Using Just Sugar & Scraps!


"And those mysterious fruit trees trained along the southern wall. Peaches? Nectarines? Victorian plums? They would have to wait and see. Oh, the bottlings, and the dryings and the storings!" 
~ Mary Norton, The Borrowers

If you are anything like myself and are trying to stretch the fruit in your household (and add to the pantry frugally) then you will love this nifty and thrifty canning recipe (shared from our Ebook here). You see, our fruit trees are a year from being productive and so we are forced to buy fruit. Here is a way to get every pennies' worth! Simply save up all your washed peelings, unspoiled pieces and meaty pits from your preserving projects, pie creations, turnovers, etc., and you can make a delicious fruit syrup or jelly from them! This will work for peaches, nectarines, pears and plums, to name a few (perhaps even apricots!). The only other ingredients you will need is sugar and water.


Method #1 (Slow Cooker)

The beauty of this little side-project using the slow cooker is that it can be dealt with the next day after your "main project" (the one in which you created the fruit scraps in the first place) is completed. Simply toss all the leftover fruit scraps as you go (peels are perfect and even the unbroken meaty pits -- but avoiding any moldy pieces) into your crockpot and then place it in your fridge until bedtime (if you don't have a slow cooker * and want to try another method, keep reading). 


Now, add enough water to just cover the scraps and turn the crock pot on low. Let this slowly simmer overnight (about 6 - 8 hours) while you sleep and dream of sweet syrups and jelly for your pantry.

Method #2 (Stove Top)

Alternatively, if you do not want to do the crock pot method, you can also cover the peels and cast off pieces with water and slowly cook in a covered saucepan until the produce is soft and releases its juices. (Note: Begin following the remaining recipe at the straining point shared below).


Turn off the crock pot when you wake up and strain the contents once it cools down a bit (a few hours is fine as I waited until my morning routine was finished before I continued this).


To strain the juice, we lined a stock pot with a large paint strainer and dumped the cooled contents inside. You can use whatever system works for you such as a fine cheesecloth or jelly bag.


Then we gathered it up like a jelly bag and let it hang over the pot in order to drain the excess liquid. Press any remaining juice through and make sure to measure the final volume of fruit water.


Next, place your measured juice in a large enough pot and bring it to a raging boil. Now that it is boiling aggressively, add your sugar.


You will need half the amount of sugar as there is liquid for this recipe. For instance, our liquid measured out at 10 cups so I added 5 cups of sugar.


Boil this mixture rapidly until it reaches a thicker consistency. This will take some time and is a good moment to get all your canning gear in order. It is not necessary to stir the syrup continuously, just once in a while to make sure nothing is burning at the bottom (which it shouldn't).


Here is an approximate guideline to get the desired results:

For fruit syrup ~ 

Boil until approximately a third of the mixture evaporates and is to desired thickness (or until thermometer reaches about 218 degrees Fahrenheit for a nice, thick, pancake syrup consistency).


For fruit jelly ~ 

Boil until approximately half of the mixture evaporates (or until thermometer reaches setting point at 220 degrees Fahrenheit).


When you reach the desired consistency, ladle the hot fruit liquid into hot, sterilized jars, leaving ¼-inch headspace. Wipe the jar rims, adjust the canning lids and process for 5 minutes in a boiling water bath. For more detailed step by step canning directions, visit here.

Alternatively, you can also store your finished products in the refrigerator and consume them within a few months.


Isn't this lovely? You get all this for your pantry with just a bit of sugar and scraps. I could cry :) Obviously, the syrup would be amazing over pancakes, waffles, yogurt, ice cream and oatmeal. The jelly version would be excellent for spreading over toast, scones, biscuits and freshly baked muffins. This would even work for our fruit and grain cereal bar recipe!

Shelf Life: Approx. 1 year


Are you ready to save your scrap pieces and peelings from fruit to create additional products for your pantry, medicine cabinet, bathroom shelves, kitchen table and more? It truly is a marvelous thing! You will find at least 100 more recipes (with matching labels) on how to use up your fruit scraps in our e-book here! Happy homemaking!

All the fine print: This post may contain affiliate links (which are merchant links that help to support this site at no additional cost to you if you purchase an item through them). This recipe was inspired and adapted from the Clemson Cooperative Extension Office.