Showing posts sorted by relevance for query chamomile. Sort by date Show all posts

Friday, March 28, 2014

Peter Rabbit's Tummy Tincture ~ A "Dose of Chamomile"


"I am sorry to say that Peter was not very well during the evening.
His mother put him to bed, and made some camomile tea;
and she gave a dose of it to Peter!
'One table-spoonful to be taken at bed-time.'"
~ The Tale of Peter Rabbit by Beatrix Potter


Stomach aches are not limited to little rabbits, humans of all ages are susceptible. A "dose of chamomile" would be a blessing to have in your pantry. Since chamomile is helpful for insomnia and is stress relieving, adults would benefit from this herb as well!  It also boasts anti-inflammatory, anti-bacterial, anti-fungal and anti-allergenic properties. Chamomile is known to soothe teething babies and reduces colic. Would you like Mrs. Rabbit's recipe for making a chamomile tincture?


Ingredients and Options:

All that is required is chamomile (dried or fresh) and  80-100 proof vodka or apple cider vinegar. While vodka is the best choice for extracting all the medicinal properties of the herb (and is odorless), you can also use apple cider vinegar if you don't want the worry of alcohol (though it won't be as potent of a tincture). Keep in mind though, if adding your "dose of chamomile" into a cup of hot tea, most of your alcohol will evaporate off in a few minutes which would solve that problem. Vodka also boasts a longer shelf life (up to 5 years in your pantry) while the apple cider vinegar will last for approx. 6 - 12 months (with refrigeration being recommended by some sources). Use either one you feel comfortable with.


"Adding a small amount of almost boiling water to the tincture dose in a cup and allowing it to cool effectively evaporates most of the alcohol, making it safe."
~ Excerpt from Home Herbal by Penelope Ody


To begin, fill a clean jar 1/3 to 1/2 way full of dried chamomile flowers (if you purchase a pound, you will have plenty of leftover for our future projects). If using fresh chamomile flowers, fill the jar 3/4 of the way.


If you want a larger quantity of tincture, use a quart jar. For a smaller quantity, use a pint jar.


Next, fill the jar to the very top with the liquid of your choice (vodka or apple cider vinegar). You want to make sure that the flowers are submerged. The idea is to have the liquid cover the herbs by 2 to 3 inches (more on that later). 


Because we used dried flowers, I ended up needing to refill the jar within 15 minutes because the dried flowers absorbed the liquid. Keep an eye on your tincture to make sure the liquid level is always full.


Next, screw on your jar lid or cover jar with plastic wrap and then cap if using a metal lid as shown in picture (you just don't want the metal to be in contact with the tincture).

Label your jar with name of herb and date. Store in a cool, dark area.

Shake every few days to infuse the herbs into the liquid (it is easy to remember if you place your tincture in your kitchen cabinet where the cups are so that when you reach for a glass of water, you are reminded to shake your tincture). My chamomile kept floating to the top so I shook the jar daily to keep it from molding.

Let the tincture sit for 4 - 6 weeks for a nice, strong blend.


When the time is up, place a small strainer over a glass bowl. Line the strainer with a piece of lightweight fabric or thin cheesecloth. Pour your tincture through.


Once contents are emptied into the strainer, gather your fabric into a small satchel and squeeze the leftover herbs to extract the last of the golden medicinal liquid.


You will be left with a beautiful tincture! Make sure to label and date your jar (we included a label in our printable recipe below). 


If you have a clean dropper bottle, then place some of your tincture inside and add it into your medicine cabinet. The remaining jar of tincture can safely be stored in your pantry for up to 5 years if using vodka (and 6-12 months for vinegar).


We included two sets of labels on our printable recipe below. One for your jars and one for the dropper bottles. We also share two designs, one whimsical and one with an apothecary appeal. We just couldn't decide ;)


Although Peter's mother prescribed a tablespoon for chamomile tea, this tincture is highly concentrated and requires much less!

Dosage (To get a better idea on determining tincture dosage, visit here):

**For adults, a dropperful (1/4 tsp.) or two taken in intervals (3 times a day) as needed and added into a small glass of hot tea, water or juice is plenty.

**Children can be given 1/2 of the dose mentioned above.

**Wellness Mama shares information on treating infants and babies with chamomile tincture here.

**And remember, if using the vodka based tincture, place in a hot cup of tea first for a few minutes to allow most of the alcohol to evaporate off.

Note: If you want to do a sweet, glycerin based-tincture, here is a tutorial that you can use with chamomile. Though the medicinal properties aren't as strong as the alcohol based tincture, the benefit is that your children will love the taste.


I personally love adding something medicinal to our pantry as part of our preparedness plan. It would be like a food storage for medicine which really appeals to me since a dried herb loses its strength after one or two years, and this tincture preserves for much longer. You are welcome to print out our recipe (found here) for your herbal.


Friday, June 13, 2014

Peter Rabbit's "Bedtime Blend" Chamomile Bath Powders ~ DIY


"His mother put him to bed, and made some camomile..."
~ The Tale of Peter Rabbit by Beatrix Potter


As chamomile was often the herb used to calm many of Peter Rabbit's calamities (since it is gentle and safe for little ones), it should come as no surprise that Mrs. Rabbit also used it during his bedtime bath routine. She had all three simple ingredients in her pantry so this was her favorite recipe (inspiration was found in this book). Here is how she prepared it (though I am not quite sure that she used a blender):


Place 4 cups of oatmeal in a large jar or bowl. Oatmeal is a very gentle cleanser that contains saponins. It gives that foamy sensation that helps to lift dirt and oil from the skin making it an excellent natural choice for those with sensitive skin.


Add 1/2 cup of cornstarch which is a soft skin soother (organic is preferred as most corn products are GMO).


Then add 1 cup of dried chamomile flowers. This herb has many health benefits but for this recipe we are focusing on the fact that it boasts skin healing properties. Chamomile soothes rashes (such as eczema), minors burns and reduces skin inflammation. The bonus is that it is also known to be relaxing. 


Place all three of your ingredients together in a blender and pulse until smooth. (This is just too easy!)


Your bedtime bath powder is now ready! Place 1/2 cup into your bath as you fill it up or scoop mixture inside muslin bags and place under your flowing bath faucet. And remember, us old folks could benefit from a soothing and stress-releiving chamomile soak as well!


To make this into a sweet gift, pour bath powders into a mason jar (the blue ones would be darling!) or vintage milk bottle, decorate the lid (we used a fabric scrap and twine), attach our label (two versions shared below) and add a Gift Tag.


You may also want to include our Peter Rabbit Room Spray, Peter Rabbit Bookmarks and other "Peter" related projects which are found here. All compliments of Mrs. Rabbit of course!

Monday, July 20, 2020

How to Make "Floral Cleansing Grains" ~ A Delightful DIY for Your Skin


"These flower-packed cleansers gently exfoliate your skin, leaving it feeling soft and smooth. Cleansing grains can contain a wide variety of ingredients, from ground oats, nuts, seeds, rice, beans, powdered milk and clays, so there's a lot of room for creativity when making them..."

A bright and beautiful Monday morning to you all! Today I am excited to share that all-natural skin care can be a frugal but beautifully floral endeavor! You can tap into your creative feminine side without tapping into your bank account. 


With that being said, I am excited to share four variations of Jan's recipes (with her permission) featuring floral cleansing grains from The Big Book of Home-Made Products for Your Skin, Health & Home. I am also going to share my variations of what I created based on ingredients we already have. That is most of the fun (and frugal part) -- being resourceful with what you have! Ladies there are so many possibilities! You can always make an assortment of "flavors" and store them in small jars according to the seasons and what is growing in your gardens. 


To begin, this is really too simple not to do! All that is necessary is to grind all the dried ingredients together in a (well cleaned out) coffee grinder until finely powdered (I actually used our high-powered blender to process mine). 

Keep in mind that you can always double the recipes (and so forth) since there isn't anything in these that will go rancid quickly (except if you use the brown rice, nuts and/or seeds -- I would use that up within 3 months). The shelf life should be about a year if you store them properly in an airtight container to keep them fresh and dry.


Jan's Recipe Combinations:

CALENDULA OATMEAL (very simple blend - suitable for all skin types)
  • 2 1/2 tbsp. rolled oats
  • 1 tbsp. dried calendula flowers

YARROW & GREEN CLAY (helpful for oily and acne-prone skin)
  • 2 tbsp. rolled oats
  • 1 tbsp. dried yarrow
  • 1/2 tbsp. French green clay


CHAMOMILE ROSE (enriched with milk and suitable for more sensitive skin types)
  • 2 tbsp. rolled oats
  • 1/2 tbsp. milk powder (cow, goat or coconut)
  • 1/2 tbsp. dried rose petals
  • 1/2 tbsp. dried chamomile
  • 1/2 tsp. rose clay

LAVENDER & BLUE CLAY (gently polishes all skin types)
  • 2 tbsp. white or brown rice
  • 1/2 tbsp. dried lavender
  • 1 tsp. dried cornflower (or use more lavender)
  • 1/4 tsp. Cambrian blue clay


To use, remove any makeup and splash your face with warm water to dampen your skin. Place 1 to 2 teaspoons of the grains in the palm of your hand and mix in with a bit of water until you form a paste. If you want to be extra-fancy, you can use another liquid such as coconut milk, aloe, hydrosol, yogurt or witch hazel to form the mixture.  Gently apply and rub the paste over your skin and onto your face and throat. Rinse well with warm water and follow with a moisturizer if desired. 

When I asked Jan if these can be used on a daily basis verses a weekly basis, here was her answer... 

"It will depend on your skin type and personal preference. Some people find them helpful as part of their daily skin care routine, while others may want to use just once or twice per week. (Personally, I use just once or twice a week on my dry skin.)"

Alternatively, you can use these floral cleansing grains as a face mask by leaving the mixture on your skin for 5 to 10 minutes before rinsing off.


Since I don't have any of the interesting clays she mentioned, I am making all my recipes without them. Here are some of the combinations I have created based on her ideas! I also made bigger batches because I like bulk supplies! It's the pantry builder in me 🤎 I also made fancy names as it is the romantic in me.  

Don't be shy...

and remember, if you don't have any of these dried herbs on hand, you can always go outside and forage for some and dry them yourself. 

Now, it's time to prepare some pretty things! Grind all the ingredients together and you have yourself some all natural beauty products!


Jes's Recipe Combinations:

SUNSHINE POWDER
  • 1/4 c. rolled oats
  • 1 tbsp. dried calendula flowers
  • 1 tbsp. dried chamomile flowers


LA VIE EN ROSE 
  • 1/4 c. rolled oats
  • 1 tbsp. powdered milk
  • 1 tbsp. dried hibiscus
  • 1 tbsp. dried rose petals


LAVENDER POLISH (I will use this as a once-a-week face exfoliator) 
  • 1/4 c. white rice (I choose the white rice for the longer shelf life)
  • 1 tbsp. dried lavender


These would also make a fun gift! Place the handcrafted floral cleansing grains in a pretty jar, tie a cute small wooden spoon around it, and attach the instructions with a sweet ribbon. Or, use the darling test tubes and corks like Jan has done (pictured in the second photo above). This is a great project for recycled baby food jars as you can have a fun assortment all labeled with your different floral creations and all lined up lovingly in your bathroom cabinet!


Lastly, congratulations to Karen for winning the "Beloved Book" Giveaway! If you signed up, don't despair as we have FOUR more giveaways to go! In the meantime, you may be able to find this book at your local library or it can be purchased on Amazon.


Now to ask you a question... Based on what you currently have in your home apothecary, garden and pantry, what recipe combinations can you whip up that would work lovely on your skin? Just to give you a head-start, calendula, yarrow, rose, lavender, chamomile, sunflower, passionflower, hibiscus, jasmine, geranium and elderflower are all beneficial for the skin. I would also love to hear some made up names for your creations! Happy wildcrafting!


Friday, March 7, 2014

Peter Rabbit's Room Spray ~ Bedtime Blend ~ For the Nursery


"I am sorry to say that Peter was not very well during the evening.
His mother put him to bed, and made some camomile tea;
and she gave a dose of it to Peter!
'One table-spoonful to be taken at bed-time.'"
~ The Tale of Peter Rabbit by Beatrix Potter


If your little rabbit is overtired and needs some rest, here is an aromatic bedtime spray to give him or her some in-scentive to sleep. A few drops of chamomile essential oil is just the dose prescribed by Peter's mother! 


To prepare:

In a clean (travel sized) spray bottle, add the following ingredients in the order they appear:
  • 1/4 tsp. vodka, optional (cheap kind is fine) ~ It helps to disperse the oils, acts as a preservative and is also a disinfectant and antibacterial. Some people use rubbing alcohol but it is not as natural a choice as vodka. However, if you have a weakness to alcohol, then I encourage you to skip this ingredient altogether. Being this is only a 1/3-cup recipe, it will keep (meaning the essential oils will not lose their potency) for the time period it takes to use the spray up.
  • Approx. 1/3 cup of water (distilled is best but I use tap water) ~ Add to spray bottle after the ingredients mentioned above. 
The chamomile essential oil will be soothing and calming, lavender will further relax the atmosphere while the orange essential oil adds a pleasant citrus touch to keep the aroma fresh.


How to use:

Shake before each use. Spray the nursery before bed or nap-time. You may even mist the bedding for some aromatherapy benefits. This acts as a nice room deodorizer as well.

Printables:


Here is our homemade label for your use. A printable recipe for your herbal is found HERE. Simply follow the link, download and print :)

Notes:

I like to use travel size bottles for our room sprays. Glass is a superior choice when working with essential oils as it doesn't leach but feel free to use what you have. I often use plastic in a pinch. 


"He was so tired that he flopped down upon the nice soft sand
on the floor of the rabbit-hole and shut his eyes."

~ The Tale of Peter Rabbit by Beatrix Potter


This "bedtime blend" would also make a sweet baby shower gift if packaged with The Tale of Peter Rabbit, the Complete Collection of Beatrix Potter Tales or even the coloring book! If you enjoy the illustrations of Beatrix Potter, then you may be interested in "Gardening with Peter Rabbit" as a way of playing with and teaching your little one at the same time.


Friday, August 19, 2016

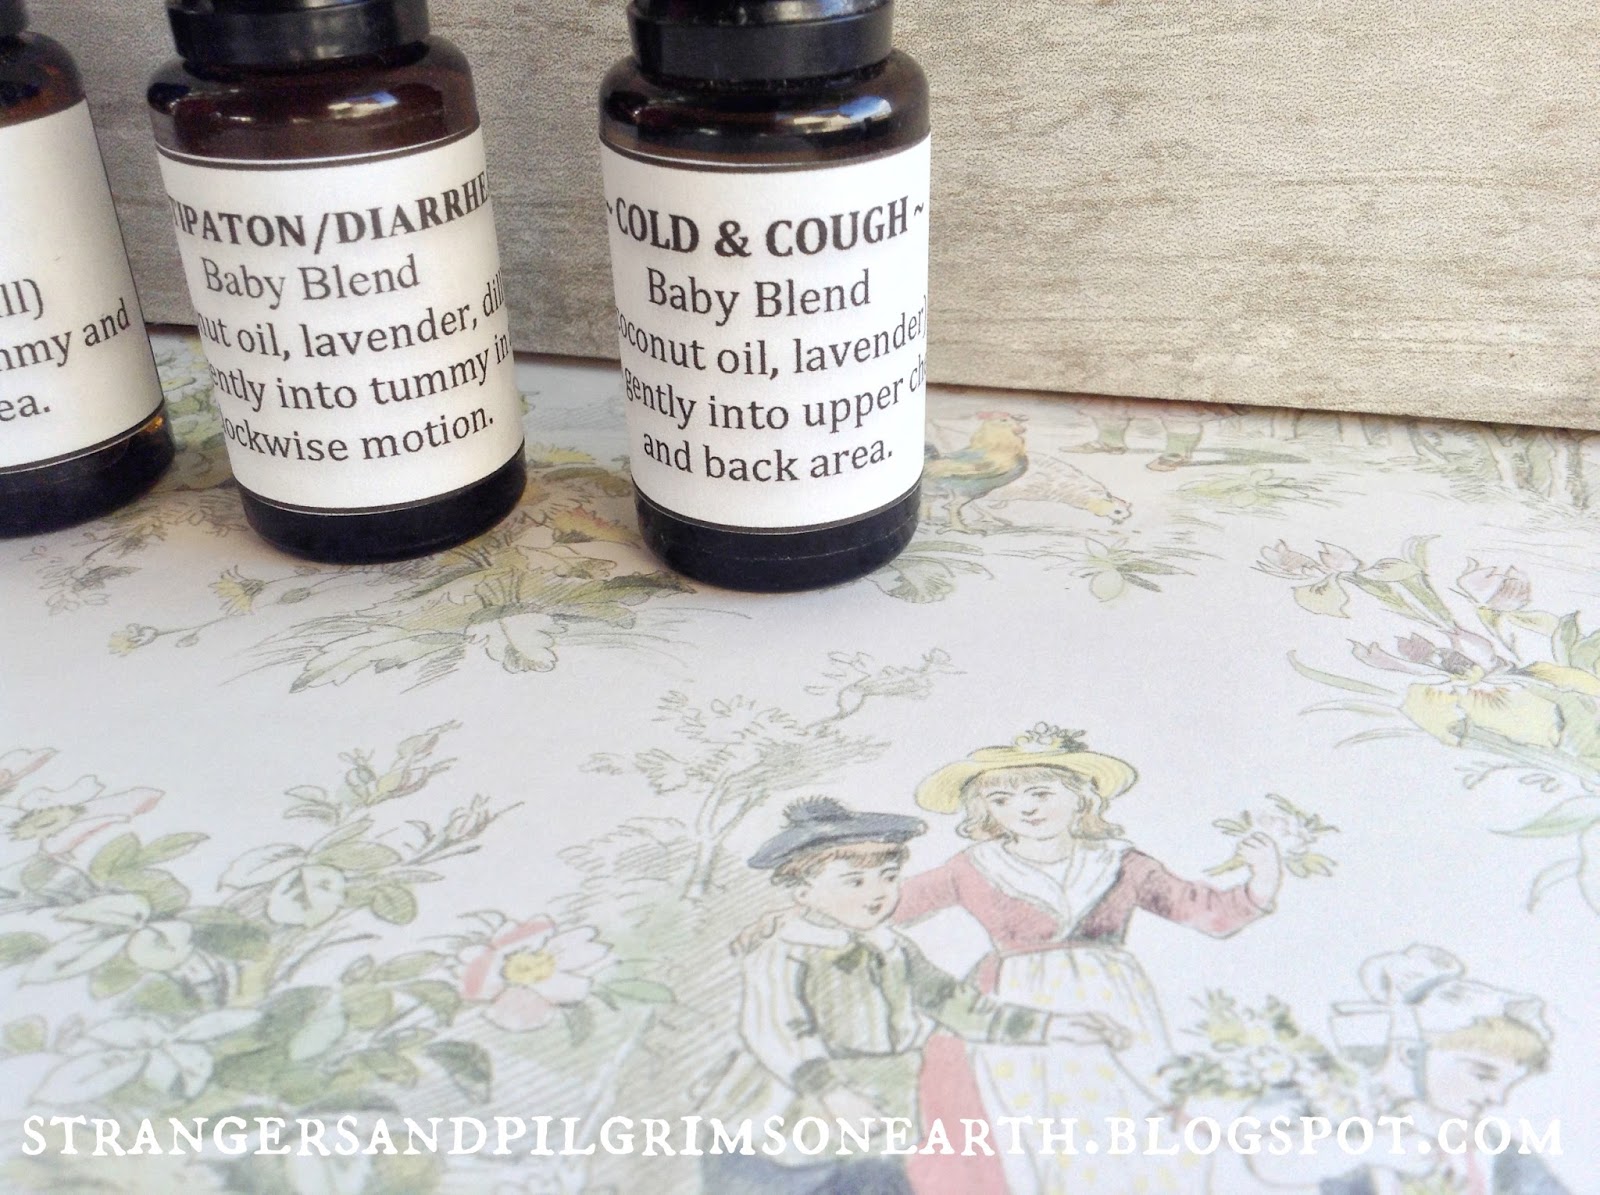
Four Safe Essential Oil Blends for Baby ~ Printable Gift Kit


"You shouldn’t think about using an essential oil on a baby until it is at least twenty-four hours old, and then there has to be a good reason."

Beautiful babies! It seems these last few months have been filled with these precious little bundles! A few women in our community have recently given birth and here is the wee-gift-set I prepared them. I am hoping these will be nice and convenient for the new mothers. I am also sharing the recipes and printable I made for this little project in case it is of any interest to you (though I printed the exact ingredients on our bottles, I removed it to make it customizable and more generic to your blends).


How to prepare the blends:

(1) First and foremost, a carrier oil should always be used and the essential oils should be diluted heavily for the tender skin. Sweet almond oil and fractionated coconut oil would be the gentlest of choices. The conservative ratio I used was 1 drop of essential oil to every tablespoon of carrier oil. Using the safe list of essential oils which I found for baby here and in this book here, I prepared these four blends which I thought would be the most useful. While I haven't seen an exact age in which you can safely administer essential oils to baby, I would personally (and I am not a professional) suggest waiting until at least 3 - 4 weeks old (and that is at an as needed basis only*).


(2) I reused our empty essential oil bottles (15 ml size) from ones that were safe for baby (such as my discarded lavender and chamomile bottles; never re-use strong oil bottles like peppermint or eucalyptus on baby as any residue oil will absorb into the blends and will be too harsh for them). I didn't wash them out first since I didn't want to introduce moisture, I simply emptied every last drop from the bottles knowing that if a bit remained, the oil inside wasn't harmful. Once the bottles were filled, I pasted on my instruction labels. I also placed a piece of tape over the labels to protect them from oil drippings and/or wet hands, etc. The inexpensive roll-on bottles would be perfect for this project too!

Note: Each 15 ml bottle holds a scant 2 tbsp. of oil blend.


(3) Prepare the recipes.

Cold and Cough ~


Colic ~


Constipation and Diarrhea ~


Fussy Baby ~


Directions ~

Add essential oil drops directly into a 15ml essential oil bottle, fill the remaining with carrier oil, cap firmly and label. Alternatively, you can cut the recipe in half and store in a 10ml glass roll-on bottle.


The reason I like pre-made blends is that in the heat of the moment, rare-a-mother has an extra hand (or second) to walk to the cabinet, find the right oil for the right problem, dig up the proper carrier oil and steadily measure out the exact one drop increments. Usually it is a frazzled moment that needs quick action! If you are interested in preparing these, you will find our printable {here}. Happy blending!

* Disclaimer: I am not a certified herbalist, aromatherapist or doctor but a homemaker interested in the arts of natural healing. While I do seek scientific confirmation of the safety and effectiveness of the herbs and remedies I use, remember that using remedies is a personal decision. Nothing I say on this blog is approved by the FDA or intended to diagnose, treat or prevent disease. All things on this blog are my opinion or the opinion of others. Also, if you have a medical condition, are taking pharmaceutical drugs, or are pregnant, please consult your physician prior to taking herbs or using essential oils.


"Before I formed thee in the belly I knew thee..."
~ Jeremiah 1:5a
All the fine print. This post may be shared with some or all of the following link-ups: The Art of Home-Making Mondays, Modest Mom Monday's, Monday's Musings, Make Your Home Sing Monday, Good Morning Mondays,  The Scoop, Titus 2 Tuesdays, Tuesdays with a Twist, Raising Homemakers, Wise Woman Link Up, Homestead Blog Hop,  Wow Us Wednesdays,  Coffee and Conversation, Homemaking Thursdays, Home Sweet Home, Our Simple Homestead, Awesome Life Friday Link Up, Five Star Frou Frou Friday, and Shabbilicious Friday. Thank you lovely ladies for hosting these. This post may contain affiliate links (which are merchant links that help to support this site at no additional cost to you if you purchase an item through them).