"Be ready in season and out of season."
~ 2 Timothy 4:2
Ever since my home birth 20 years ago, I realized there are many ways to peel a potato (I do know the phrase is skin a cat but I thought peel a potato was more "homemakery")! And this is especially true in the medical world. While you can go to the doctor for every single thing, with just a bit of medical knowledge, a homemaker can treat many ailments in the comfort of her own home. This post is a mix of homespun healing and medical preparedness the old fashioned way. I'm sure there are many more experienced homemakers sharing in this area but my desire is that this little article does at least open your mind to explore the information (and do just a bit more in your household). While I don't claim to be an expert on the subject of preparedness, I just wanted to share the practical things I am doing or have done in our family. Some of this may upset some people but I'll share it just the same because I feel the importance, especially in this particular situation we all find ourselves in (a situation where we are losing control of our personal choices and medical freedoms). We still have the power to educate ourselves, prepare and act accordingly in our own homes.
I also want to add that I am not preparing out of fear, it is more a matter of fact. When I am out and about and I see something that would apply, I add it to my preparedness cabinet. When I am home and think of something that may be useful, I'll order it and tuck it away for the future (if need be). This hasn't been a rush to get it all done type of thing, but a slow process of getting my household in order in case the unexpected happens. There is no panic feeling in our home (perhaps sometimes "incredulousness" but definitely not "panic") and I certainly do not want to add any to yours! Plus, when a homemaker prepares, there is no need to panic!

I'll be honest, our family are not doctor people (while I appreciate and respect their operating skills, I feel they are a specialized need and not necessarily someone we should rely on for daily health issues). We had our daughter at home 20 years ago which I think was the beginning of a desire to live more naturally and less pharmaceutically. We have been to the hospital once (in our 24 years of marriage) for a medical emergency and have probably gone to the doctor 5 times in the last 20 years. And when I say doctor, I am meaning a walk-in-clinic which is independent from the insurance system and all the red tape that surrounds it. We try and tackle all medical issues in-house. When it gets out of our reach, then we go to a trained physician. But even now, it is a huge concern for any of our family to need the hospital in general. Once you check in, you may lose access to all your loved ones and can be quarantined behind doors never to see your family again. I have seen this many times already with loved ones in our churches and it breaks my heart. So honestly, my goal is to stay clear of those white "sterile" buildings if at all possible.

To begin, I'll state the obvious, it is important to eat healthy and keep active. Prevention is the best form of medical preparedness! Right now is the time to practice health! But things do happen and it is wise to prepare for it when they do.
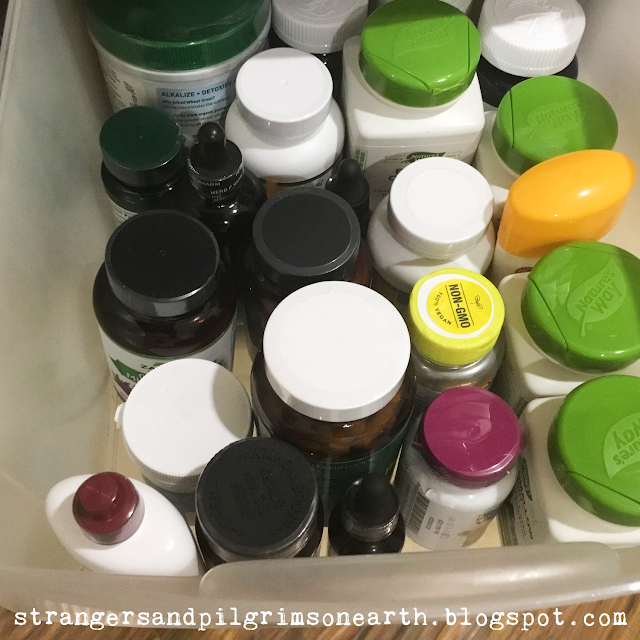
For starters, I always keep an extra stash of every supplement we use in our family. This way, we have a rotating inventory and never run out. For instance, one bottle is kept in our kitchen cabinet for necessary use and an alternative bottle is stored in a "stash" drawer for when we run out of the first bottle. When we do run out of the first bottle, I immediately order another and replace the kitchen cabinet bottle with the one that had been stored. The new bottle I ordered will now be placed in the stash drawer. This way, I always have a back up of everything we use. When Covid first hit, I noticed my usual source of colloidal silver was sold out for months. This didn't affect our household because I had a back up bottle in the stash. Thus, I try and keep this simple rotation going. It does cost extra money up front because I am essentially keeping an inventory of two of everything but the expense is worth it to our family.
I am also going to share what we keep in our all-natural home pharmacy and some non-scientific explanations of how we use these items. These are my homemaking terms of how we utilize everything. I would love if you share any additional resources in the comment section! We can all learn from one another.
Our Natural Pharmacy:
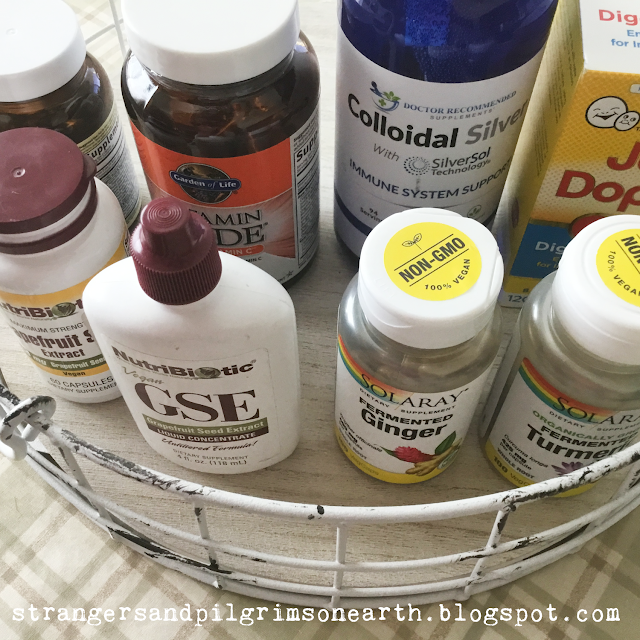
- Vitamin C (We buy the raw capsules and also use our homemade rose-hip medicine) - take vitamin C as soon as you feel like you are getting sick and load up often (I do 3-doses a day until symptoms subside). Do not take it on a regular basis because this is something you can build up an immunity to. Use for times of sickness and/or prevention (like if someone in your household is getting sick and you want to try and avoid it).
- Grapefruit Seed Extract (We use these drops for "eliminating" things! For instance, if you think you ate something "off", take grapefruit seed extract. If you fear the water you are drinking is not quite safe, add in some grapefruit seed extract. If you want to decontaminate something, use grapefruit seed extract! This is all in non-medical terms so I obviously implore you to do your own research but we have found this to be an amazing thing! My father had a horrible fungus on his knee that he couldn’t get rid of. He poured grapefruit seed extract on it, and though it burned to high heaven, it healed his knee. I usually use it internally because I can’t handle that sort of thing.)
- Probiotics (We use this on a daily basis as it is an immune booster but you can always use it as a medicinal supplement if it's out of your budget. Fermented foods (sauerkraut, fermented pickles, kimchi, yogurt, kefir) and drinks like kombucha are ways you can affordably and healthily add probiotics to your diet as well. But keeping this healthy bacteria in your body gives you a stronger immune system. This is also a great supplement to help those with stomach and digestive issues.
- Elderberrry AKA Sambucus (Any form of elderberry would be wise to keep on hand. We make our own medicine with the dried elderberry but you can also buy the syrup here.) Plainly said, elderberries are immune building and bad-bug-busting berries! They have both antiviral properties and are anti-inflammatory which make them a natural flu and cold fighter that can relieve coughs, sore throats, (upper respiratory infections) bronchial infections and sinus conditions. They can also be used to treat herpes, shingles, while some claim it even helps with allergy relief. The berries are also high in vitamin C, flavonoids , and other polyphenols. You can make them into teas, tinctures, syrups, medicinal honey, etc. You will find all our tutorials for elderberry medicine here.
- Colloidal Silver Liquid (This is excellent immune system support which can be utilized for many things…) Colloidal Silver is a mineral that can be used to cleanse the gut, boost the immune system, combat inflammation, and soothe minor skin conditions. The minute we feel something coming on, we start taking a teaspoon at a time (3 times a day). There is no odor or flavor so this is easy to ingest. I also decant some in a spray bottle for convenience and have used this for skin issues as well as for spraying in the mouth to treat a sore throat and in the eye to treat pink eye). It is very soothing.
- Vapor Rub (Sometimes it is the time old remedies that we forget to include! Vapor rub is quite relieving for coughs, cold, aches and is a topical cough suppressant. If you don't want to use the petroleum jelly product, you can easily make your own with our tutorial or use the Breathe vapor stick from doTERRA).
- Epsom salts for soaking (It soothes aches and pains, supplies the body with magnesium which most of us are deficient and boasts excellent "drawing" power. This brings me to the important use in first aid, this can be used to help "draw out" things such as splinters, venomous bites, dog bites, stepping on something rusty, etc. When someone in our family was bit by a dog, it was the soaking of Epsom salts that helped the infection most. I would soak three times a day for wounds of this caliber (with also a strong dose of Vitamin C and the appropriate essential oils such as frankincense, lavender, tea tree or even lemon essential oil in some circumstances).
- Garlic 🧄 (I just had to add this to the natural supplement section although it is a fresh food. Whenever we are fevering, we smash raw garlic and rub it onto the bottom of our feet (3 times a day). I'll also soak the crushed garlic in olive oil and apply it more easily. This is a natural antibiotic and works wonderfully to heal the system and break fevers. For a stronger blend, add a few drops of oregano essential oil to the olive oil mixture! This has kept our family from the doctor’s and urgent care for most of our life (though I didn’t use the oregano oil when our daughter was younger).
- Fermented Ginger Capsules (My non-medical description is that we take this for all our stomach related issues and I also use it 3-times a day when I feel some sickness coming on. It aids in digestion, reduces nausea, and helps fight the flu and common cold.) Dr. Mercola says it like this; "Improve GI symptoms such as occasional bloating, gas, fullness and abdominal discomfort, support digestive health, your endothelial villi regain their normal height and structure for optimal nutrient absorption in your gut, support a normal inflammatory response in your gut. Improve daily regularity..."
- Fermented Turmeric Capsules (My non-medical description is that we take this for the anti-inflammatory benefits and overall immune support. I'll often go back and forth during illness between this and the ginger in a day.)
- Ginger (fresh - I keep a stash in my freezer for our home remedies, recipes are shared below in our "herb" section.)
- Wally’s Ear Oil (While we didn’t have any ear issues with our daughter growing up, I had friends who did and this organic ear oil was a blessing to their household so I decided to include it here if this seems to be a sensitivity in yours).
When we begin to feel sick or are actually sick, I use the applicable items described above and administer them approx. 3-times a day. In order for natural remedies to work, I feel that consistency is key. You need to repeat the doses as necessary until "healed". One dose is not going to be productive in most cases. I am not a medical professional, I am just sharing what we do to keep healthy. We are not on any medications so I am not sure of any contraindications. Please do your own research prior to treating you and your family but know there are so many treatments you can do in your own home that are effective and affordable.
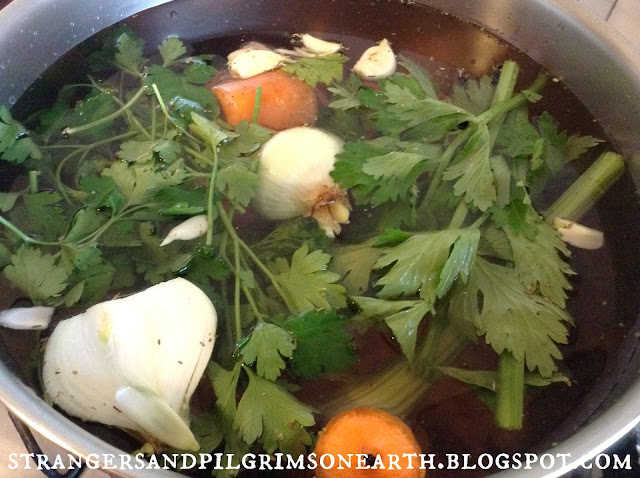
"Science validates what our grandmothers knew. Rich homemade chicken broths help cure colds. Stock contains minerals in a form the body can absorb easily—not just calcium but also magnesium, phosphorus, silicon, sulphur and trace minerals. It contains the broken down material from cartilage and tendons–stuff like chondroitin sulphates and glucosamine, now sold as expensive supplements for arthritis and joint pain."
I also feel it is worthwhile to add the benefit of homemade chicken soup (made with nourishing broths) in times of sickness. Grandmother really did know best! A homemaker who keeps stock on hand in the freezer (or by canning) is definitely practicing medical preparedness for their family! You will find more information on making healthy broth HERE.
I had once shared how during our last year of homeschooling, we read
Hiroshima together. After finishing the book, I felt a great need to stock up on our first aid supplies (as that was the sought after element during that tragic time). I went to Walmart and purchased many bottles of alcohol, bandaids, peroxide, you name it! This was done during a time of plenty so I don't consider that hoarding but preparing. Well, as soon as the "crisis" hit us awhile back, my husband came home saying an elderly man he knew was panicking as he needed alcohol to clean some of his medical supplies and couldn't find any. It felt so good to be able to hand my husband a bottle knowing we had plenty to share and plenty for home use. These are the things I am thinking of as I continue to build my medicinal pantry, my first aid pantry, my toiletry pantry and my food storage. That investment into my first aid kit only set me back $20 as alcohol was cheap at that time ($1 per bottle) and little did I know what a sought-after item it would turn out to be a few months later! So, I keep a decent little stock of the following items as you never know.
Our Basic First Aid:
- Tylenol and/or Advil (basic pain relief and Advil for inflammation and fever relief) I was told by a doctor that taking 4 Advils is similar to a prescription dose (which is basically 800 mg of ibuprofen). I write this because it is good to know these things in an emergency situation. Knowledge is power.
- Benadryl (for allergic reactions like bee stings, hives etc.) We don't use this on a regular basis.
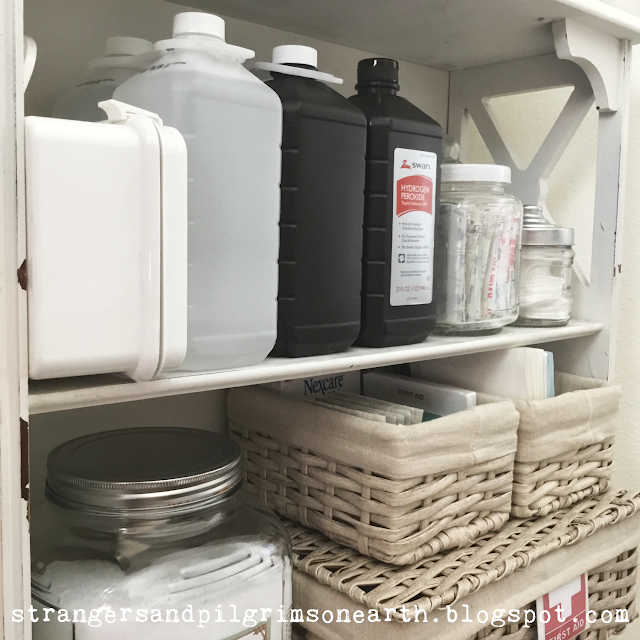
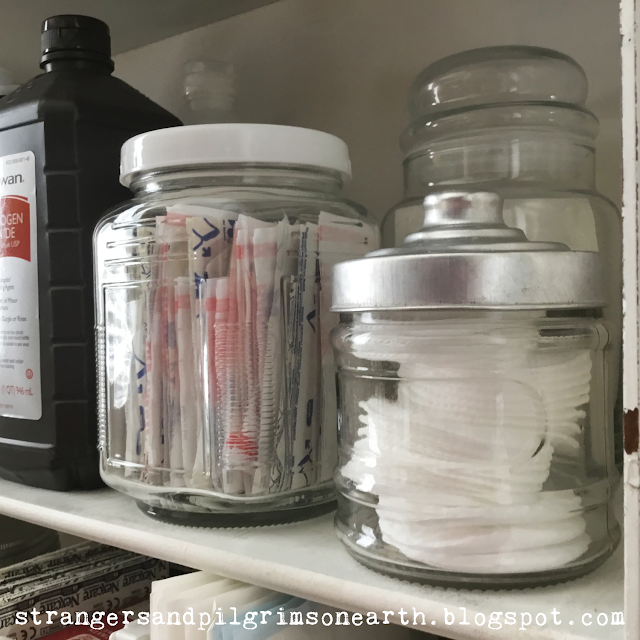
- Hydrogen Peroxide and Alcohol (for cleaning cuts, scrapes and wounds, etc.) On a side note, peroxide can also be placed in a spray bottle for natural cleaning. It's a natural disinfectant!
- Bandages, bandaids, adhesive pads, bandage wrap, gauze and tape, cotton balls. (As a side note, I also keep an extra supply of feminine napkins which can double as a bandage in an emergency as well as being useful in times of monthly need.)
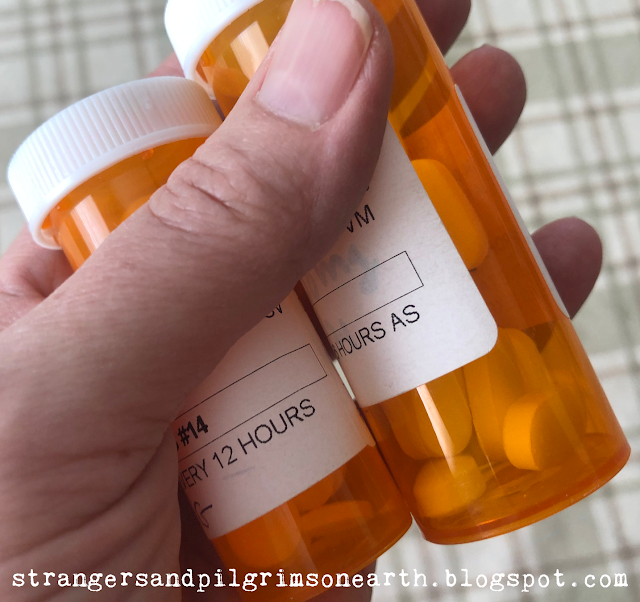
Another thing we do which may seem taboo to some people (but we think of as prudent planning) is filling prescriptions. While we rarely have gone to the doctor as I have shared earlier, the times that we have, they love to prescribe antibiotics, anti-inflammatory medication and/or painkillers. I personally feel this is often done in excess just to give the patient the feeling that something is being done for them. In the times that this is the case (and I find it is more often than not), and we don't feel a dose of antibiotics (or additional pain relief) is necessary, we still fill the prescription. We add this to our preparedness stash. It may actually be useful on a rainy day and given our current circumstances, it may not be available to you once you actually need it (or you may have to go in to the doctors to get the prescription and compromise your health in other ways to get it). We also do the same with pain medication. We have been prescribed the 800mg dose of Ibuprofen when we weren't in enough pain to actually use it. But we fill it just the same and keep it in our medicine cabinet for medical emergencies. If my back goes out and I am unable to move, I have relief at the tip of my fingers.
Pharmaceuticals we currently have on hand:
- Antibiotics (7-day dose -- low grade antibiotic)
- Anti-inflammatory/Pain Reliever (Bottle of 800 mg Ibuprofen)
I also don't follow the expiration date too closely. While they may lose their strength over time, I don't think they will harm you in any way if past the "so called due date". Usually it is simply a sell-by date.

Essential oils also play a huge part of our natural preparedness medicine cabinet. While there are hundreds to choose from, I will share the most useful in our home. These will last for 3-5 years if kept in a cool, dark area. The citrus oils have a shorter shelf life of 9-12 months.
Basic Most-Useful Essential Oils (While I utilitze many more, I just wanted to encourage you to at least try the most versatile):
- Lavender -- We use this for basic first aid needs such as bug bites, skin irritations, minor burns and sleep enhancement.
- Tea Tree Oil (aka Melaleuca) -- We also use this for basic first aid needs such as for bug bites, sunburn, athletes foot, fungus, coldsores, minor cuts and scrapes. Could also be made into a convenient spray for these things and used as a mild hand sanitizer and countertop cleaning spray. This is such an effective oil!
- Oregano -- This is such a potent oil (always dilute it!) and is a natural antibiotic with antiviral, anti-inflammatory, and antioxidant properties. This is the "big guns" oil in our household. If we just can't get past something, we will add a few drops to olive oil and rub it into the bottom of our feet (if fevering) or on our chest (if congested). It is very strong and I wouldn't suggest it for little ones. Lavender oil is more appropriate for small children and infants.
- On Guard and/or Thieves -- Apply the On Guard and/or Thieves oil blends (with a carrier oil) onto the back of neck, front of neck and shoulders when going out in public or when you start to feel "off" (or frugally make your own here). Use it as a room spray, germ killer and sanitizer for door handles, sink handles and telephones.
- Breathe -- Use when congested with a cold and/or cough. When symptoms manifest, there is nothing like being prepared. Simply rub a few drops of Breathe essential oil with a bit of olive oil, almond oil or coconut oil to the neck, chest and lung area . You will instantly feel some relief! If you are interested in making something similar to "Vicks" but with a natural oil base (instead of a petroleum one), then prepare our easy recipe here.
- Digestzen (This blend is amazing for heartburn. You can feel the relief in minutes when rubbed directly on your chest. This is also useful for upset stomachs. I have to say this is the most amazing essential oil blend! I can't praise it's effectiveness enough!)
- Essential Oils for Babies (Visit this article here).
- We also diffuse the essential oils in time of sickness (and on a daily basis). Our humidifier which is also a great tool for the cold and flu season doubles as a diffuser which makes it an excellent tool. I purchased a 2-liter model which works for about 24 hours (I had gotten sick of constantly refilling them so I went "big"). The "steam output balances a room’s humidity level to help fight dry skin and temporarily relieve congestion, cough, and dry throat" which is a wonderful winter soother.

I also like to have on hand the basics for making herbal medicinals (shared more in-depth here). With a handful of herbs and a few other ingredients, you have the opportunity to make a variety of useful products for your home apothecary without needing to go to a drug store. Here is what I keep on hand and some simple recipes:
Home Apothecary Basics:
- Raw apple cider vinegar, glycerine and/or 80-100 proof alcohol for tincture making. The shelf life of these items are almost indefinite and are safe to store for preparedness. (There are three different types of tinctures you can make; an alcohol-based tincture, a vinegar-based tincture and a glycerin-based tincture (also called a glycerite). Alcohol makes the strongest extract, vinegar the second strongest and finally, glycerin is the least potent (but it's beauty is in the fact that it is sweet tasting for children, is without alcohol and boasts a longer shelf life than the vinegar option). Visit this post for more information and if you are concerned about using alcohol based medicine.) I will also add that these items are quite versatile and would be wise to store for other various reasons. The vinegar can also be used in preserving and pickling, the glycerine can be used in making many household and bath products. Vodka is also a natural disinfectant and antiseptic. It could be used for preparing baking extracts, used as a disinfectant and in times of extreme emergency, it can act as pain relief. It can also be used to treat toothaches, clean wounds, clean your house and is a preserving ingredient in aromatic room sprays. As all three of these items have long shelf lives, I consider them a good investment.
- Raw honey (local honey is preferred). This too has an indefinite shelf life and can be used with herbs to make medicinals and is medicinal in itself! I have a print out sharing ways that a bulk supply of honey can be useful in your home and therefore be an excellent preparedness item. It can be used to make electuaries, oxymels, herbal honey, heal sunburns, wounds and ease allergies (to name a few). You will find our printable here.
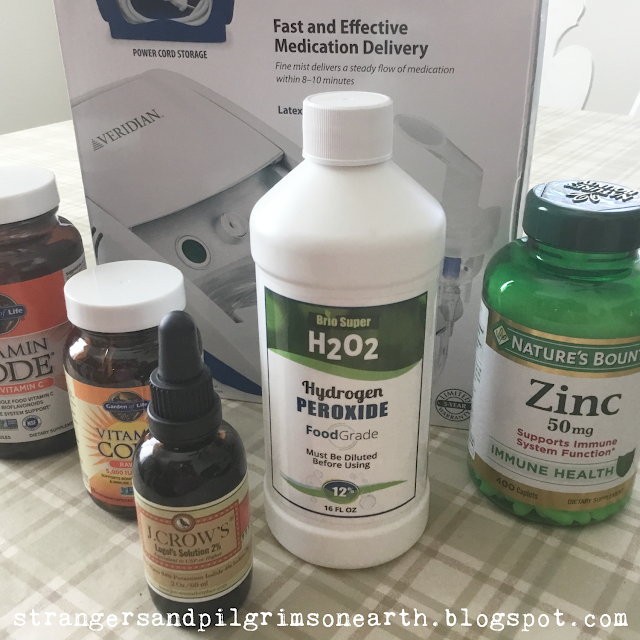
And finally, regarding the situation that is looming over all of us.... COVID-19. I'm not going to go into all the political avenues on this or my beliefs on the subject but, if you are of an independent and “natural minded” nature, being prepared is possible. While there are many treatments which I have read which have been quite affective, the idea is to choose one that is doable for your family. I have opted to invest in this method (nebulized peroxide) for my home pharmacy (it is shared by an ex-Nurse who I trust who does her research). I do not want to check myself into a hospital for these symptoms as once you get in, it is an act of Congress to get out. Loved ones are not allowed inside and your medical freedom is often threatened. We are keeping this early treatment on hand and have told our family so that there are options available for those who want them. This system can also be used to help out other respiratory illnesses so I think it is a useful investment. It basically requires a nebulizer, saline solution and food grade hydrogen peroxide. The choice is yours. I just wanted to remind you dear ladies out there that we do still have a choice although at times it may not feel like it. We can take our health into our own hands if we feel uncomfortable with what is going on in the hospitals.
COVID-19 Combatants:
- Nebulizer (see usage and recipe in this article here) Be sure to obtain an electric tabletop jet nebulizer as the battery-driven handheld versions aren’t as effective.
- And these four vitamins are also used for prevention and reducing the risk of symptoms in general: Vitamin D3, Vitamin C, zinc and Quercetin. You will find more information on this vitamin protocol here.
Though I don't feel our family is at risk for any serious danger from this flu (we don't have any serious respiratory weakness), I do want to keep up on the prevention end and have the ability to help the elderly in my family with the other options I shared.
"Although you can't purchase skills in things like first aid as easily as you can purchase a box of bandages, you can purchase or borrow books and take classes. In fact, I would consider a reference library an invaluable preparedness tool."
~ Kathy Harrison, Just in Case: How to Be Self-Sufficient When the Unexpected Happens
I also wanted to share the books and resources I keep on hand for medical emergencies. You can't always rely on "Dr. Google" as the internet may not always be available. While I have more in my collection (I found all of the above books in thrift stores and I collect them as I see them), these would be the books I recommend every household have.
Knowledge:
- Smart Medicine for a Healthier Child (Shares natural and conventional treatments. I can't say how many times I used this book at 3-in the morning before the internet existed in my home. It is a must have if you have children in my opinion.)
I also wanted to mention the
Deep Roots at Home Blog (While I can't spend all day searching out the latest in the medical world, I do rely on this blog for guidance. She is a conservative, ex-nurse who shares all kinds of alternative medical information with a Biblical foundation. I print out pertaining articles and place them in my Proverbs 31 Preparedness binder for information purposes.)
Goals:
Something I also have on my to-do list is to get trained in CPR, first aid and/or some kind of "first response" class. I'd like to do this with my daughter as I feel it is a beautiful homemaking skill to have. It was on my list of things to do before she graduated and yet it evaded me. I think this is such a useful skill for the homemaker and I believe the training is only a few days to a week in most cases.

I hope some of this information provides some ideas or at least food for thought. This doesn’t have to be done overnight. But little by little you can build up a medical preparedness system which can get your family through a good and decent amount of circumstances. We have all seen that everything isn’t available when you necessarily need it. Let’s choose wisdom and slowly plan a way with the sound mind our God has given us. It is not the government’s job to take care of our every need, it is their job to govern. It is the homemaker (with God's help and divine wisdom) who is responsible for the provisions (with husband’s help of course!) and well-being of everyone in her home (the Greek translation of "keeper at home" is actually "guard of the home" or "watcher of the home"). Once again, what a valuable position this is!
Disclaimer #1: I am not a certified herbalist but a homemaker interested in the arts of natural healing. The information I have learned has been gleaned through study of some of the following favorite books; Rosemary Gladstar's Medicinal Herbs: A Beginner's Guide, Herbal Recipes for Vibrant Health, Grow Your Own Drugs by James Wong, and The Complete Illustrated Book of Herbs by Reader's Digest and websites of various herbalists. I would also like to mention that some of the links in this post are affiliate links and I receive a small percentage of the sale if they are used.
Disclaimer #2: I am not a doctor. While I do seek scientific confirmation of the safety and effectiveness of the herbs and remedies I use, remember that using remedies is a personal decision. Nothing I say on this blog is approved by the FDA or intended to diagnose, treat or prevent disease. All things on this blog are my opinion or the opinion of others. Also, if you have a medical condition, are taking pharmaceutical drugs, or are pregnant, please consult your physician prior to taking herbs, etc. #medicalpreparedness
To begin your own
Proverbs 31 Preparedness Binder, here is a
printable cover page. I've be placing much of my information in this binder for any "time to come" and can pass this down to my daughter one day as a beautiful resource. In the meantime, here are the preparedness articles we have shared thus far to get you inspired to continue adding to your Proverbs 31 Preparedness notebook:
⛑ 🧺 🩹
What are your thoughts on this? I’m so curious! There are many "ordinary" homemakers like ourselves who feel this importance and are sharing their ideas and experiences that you may also appreciate such as Annabel at
The Bluebirds are Nesting and Patsy at
A Working Pantry. I also glean much from
The Prudent Homemaker and the Preparedness Mama (though her blog is solely preparedness tips). There is so much that can be covered on this topic, do you have anything to add?