Pages

Friday, January 30, 2015

How to Identify Calendula {Pot Marigold vs. Common Marigold}


"With those bright, yellow orange flowers, you might mistake calendula flowers for any other marigold. But calendula is actually an entirely different plant. It's native to northern Africa and the south-central portion of Europe, but it can be grown elsewhere, including indoors. If you can't visually distinguish calendula flowers from marigold, you'll probably be more successful using your nose: regular garden marigolds give off a strong, unpleasant aroma (although some people like it); calendula flowers are comparatively milder."


If uncertain whether you have a common marigold or the medicinal pot marigold (aka Calendula officials) growing, pluck off a deadhead of the flower and examine the seeds. The common marigold will be straight and stick-like while the calendula will have curved seeds with a toothed exterior (as shown in photo above).


Pot Marigold (Calendula officinalis) verses Common Marigold (Tagetes Marigold)

One is a medicinal masterpiece, the other is simply a fragrant flower...


Calendula officinalis {Pot Marigold} ~ Medicinal Uses

According to herbalist James Wong, calendula, "having antiseptic and anti-inflammatory properties" boasts a "wealth of potential uses" when prepared into lotions, creams, ointments, teas and tinctures. Using the proper preparations, calendula can help to heal minor burns, sunburn, insect bites, stings, sores, pustular blemishes, acne, cuts, abrasions, inflamed rashes, diaper rash, hemorrhoids, varicose veins while internally it can aid stomach disorders, ulcers and painful periods.


The part of the calendula plant that is used medicinally are the flowers. When the weather allows, take a walk outside, breath in the fresh air and really examine your surroundings. I found our calendula plant in the corner of our hay field. I didn't even know it was there until a few years ago when I began opening my eyes to God's healing pharmacy! In our climate, they introduce themselves in very, very early spring and have self-seeded each year. And you needn't be afraid to harvest the blooms as it will only encourage more budding!


In order to preserve calendula for future projects, you can dehydrate them in a dehydrator or lay them out on a screen or paper towel in a cool, dark area with plenty of air circulation. Flip them every few days until they are dry and brittle (which should take about two weeks depending on your climate).  For quicker results, dry only the petals. Store the dried flowers in an airtight jar (canning jars are great) and out of direct sunlight (like in your pantry).


If you can not find them in your backyard between early spring and summer, you can purchase them here. Calendula will be our next highlighted herb in our Home Pharmacy Series {see Calendula Collection of Recipes here} and we hope you will enjoy making some natural medicine with these pretty but powerful flowers! We are also hosting a link up of calendula exclusive posts so that you can share your information with us!
The following posts have been shared thus far in our series:


This post may be shared with some or all of the following link-ups: The Art of Home-Making MondaysModest Mom Monday'sMonday's MusingsMake Your Home Sing MondayGood Morning Mondays,  The ScoopTitus 2 TuesdaysTuesdays with a TwistRaising HomemakersWise Woman Link UpHomestead Blog Hop Wow Us Wednesdays,  Coffee and ConversationHomemaking ThursdaysHome Sweet HomeOur Simple HomesteadFrom the Farm Blog HopFront Porch Friday Blog HopAwesome Life Friday Link UpFive Star Frou Frou FridayShabbilicious FridaySimply Natural Saturdays and Clever Chicks Blog Hop. Thank you lovely ladies for hosting these. This post contains affiliate links. Web source.

Disclaimer: I am not a certified herbalist but a homemaker interested in the arts of natural healing. The information I have learned has been gleaned through study of some of the following favorite books; Rosemary Gladstar's Medicinal Herbs: A Beginner's GuideGrow Your Own Drugs by James Wong, and The Complete Illustrated Book of Herbs by Reader's Digest and websites of herbalists (such as the Bulk Herb Store Blog).

I am not a doctor. While I do seek scientific confirmation of the safety and effectiveness of the herbs and remedies I use, remember that using remedies is a personal decision. Nothing I say on this blog is approved by the FDA or intended to diagnose, treat or prevent disease. All things on this blog are my opinion or the opinion of others. Also, if you have a medical condition, are taking pharmaceutical drugs, or are pregnant, please consult your physician prior to taking herbs.

Wednesday, January 28, 2015

Fast and Festive Taco Casserole {GF} ~ Printable Recipe


I don't know about your family but mine loves anything which remotely imitates a taco. The best part about this recipe is that you don't have to fry up all those tortillas to get that taco-ey taste!


Cook together in a large pan (I used a 5.5 quart pan like this) :
  • 2 lbs. ground beef 
  • 1 c. onion, diced
  • 1/2 c. bell-pepper, diced

When beef is cooked through (and no longer pink), add the following ingredients to your pan (and do not drain the liquid, that is a key player in the taco-taste):
  • 2 c. cooked beans, undrained (pinto, black or kidney) (We use and love black for this.)
  • 2 c. tomatoes, diced 
  • 1 c. corn, frozen or canned
  • 1 package of chili seasoning
  • 1/2 c. water 

Let this mixture simmer together for 5 minutes and begin preheating your oven for 350 degrees.


Meanwhile, grease a 9 by 13 inch casserole dish and sprinkle about 2 cups of coarsely crushed tortilla chips at the bottom (very flexible, I even threw in some leftover random corn chip crumbs that my husband brought home from a road trip).


Once the beef and bean mixture is finished simmering, layer and spread evenly over the chips, the following ingredients in order: 
  • beef/bean mixture from above
  • 2 c. shredded cheese (I used mozzarella but you can use your favorite.)
  • 1 c. coarsely crushed tortilla chips 
  • 1 c. (more) shredded cheese
  • 1 small can of sliced or chopped olives (Black is prettier and preferred but I used green because it is all we had at the time.)
  • optional: fresh chopped parsley or cilantro

Bake at 350 for 30 minutes (uncovered) until bubbly on edges and cheese on top begins to brown (like photo shown below).

Serve with a green salad or a platter of ranch dip and veggie sticks.

Optional: Garnish each serving with a dollop of guacamole, sour cream, fresh parsley, cilantro and/or chives (or just enjoy as is!).


Suggestions and Variations:

Divide recipe into (2) 8 by 8 pans and freeze the extra casserole prior to baking for a future meal if you have a smaller family. 

As this is a very flexible recipe, you could use less cheese, more cheese, less chips, more chips, etc. according to your family tastes or dietary needs. Here are some other suggestions to prepare this recipe using some of the ingredients you may have on hand:
  • Use ground turkey or ground chicken instead of beef.
  • Use a can of diced tomatoes (with juice) instead of the fresh tomatoes (and omit the water in the recipe).
  • If you like really spicy food, try replacing two cups of salsa for the fresh tomatoes.
  • Try one packet of taco seasoning instead of the chili seasoning packet.
  • Use 1/3 cup of homemade chili/taco seasoning in lieu of the purchased seasoning packet.
  • Use corn chips to replace tortilla chips (just make sure it is a corn-based chip to get good results).

Simply click on the link HERE to download your recipe (then save and/or print out the recipe from there). Also, if your family enjoys these types of meals, you may also like to try our Chili Cheese Fries!


"A good dinner sharpens wit, while it softens the heart."
~ Daran.

Friday, January 23, 2015

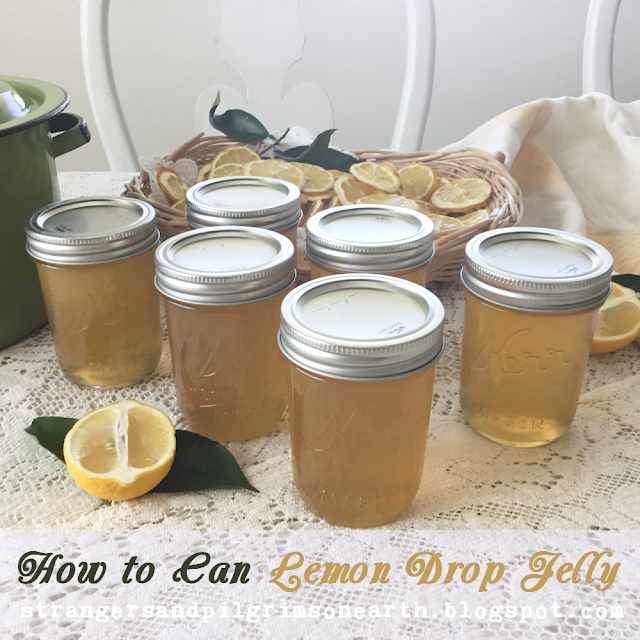
What To Make and Do with Lemons ~ Citrus Series


"The Lemon.—This fruit is supposed to be a native of the North of India, although it is grown in nearly all sub-tropical climates. In general, the fruit is very acid, but in a variety known as the sweet lemon, or bergamot (said to be a hybrid of the orange and lemon), the juice is sweet. The sour lemon is highly valued for its antiscorbutic properties, and is largely employed as a flavoring ingredient in culinary preparations, and in making a popular refreshing beverage."
~ Mrs. E.E. Kellogg, Science in the Kitchen, 1893


If you enjoyed these ideas, you may also be interested in What to Make and Do with Oranges.


Wednesday, January 21, 2015

Homeschooling When People Know You're Home ~ A Tragic but True Tale of My Mediocre Beginnings


{I am a bit embarrassed to share this but do so in hopes that it will encourage others.}

For a lot of family members and friends, it is hard for them to realize that your “let’s-go-get-coffee-on-the-spot" schedule must be altered. Or, perhaps you were like me in the beginning and you were the culprit. I flirted with the two life-styles. I was a homeschooling mother when there wasn’t anything else to do on the social calendar!


Tupperware parties, baby showers of old friends (I’m sure I can come up with their names if I really tried!) and occasional invitations to Starbucks (Just how many “times” does it take to call something occasional?) were beginning to overpower the days I spent at home with my child. Then, I would get frustrated when I didn't finish all those neat projects I had planned for our school. The house certainly wasn’t cleaning itself and the dinners were getting skimpier by the meal. By the end of the day I was tired, wiped out and grumpy from trying to get it all done. Could I really home educate? The answer is yes, if I truly dedicated myself to our home and our school!


Help from Your Husband

I wish I could say I was the mastermind in the area of reducing, but it was truly my husband who helped me to crop and chop my calendar of events. I can tend to be the “I don’t want to hurt their feelings by not going person” while my husband helped me to realize that the family God gave me were the ones that were getting hurt. The impatient mother and snappy wife were teaching something, but not the skills I had in mind! It was time to show my dedication to my family and my home.


Prioritize Your Calendar

Yes, there are times when a baby shower is in order (the key here is “close” family and friends) or a jaunt to a coffee shop to do some catching up. Consider Saturdays when father is home to bond with the children or when a friend is really in “need”. As far as the “product” parties go, you can politely call the hostess and say you made a commitment to homeschooling your children that you take seriously but would be glad for a catalog. She will be just as pleased (and maybe even impressed). Perhaps you can limit some of your social activities to once of month and give grandmother some special bonding time with the grandchildren on that day. The bottom line is that your home schedule should dominate your social calendar.


Telephone Time

Maybe you are already in tune with this simple philosophy and it’s not the running around that is draining you but the constant telephone calls. That was my second problem once we faced the first problem. (Yes, I am a slow learner.) We would be in the middle of a craft with paint all over my hands and sure enough the phone would ring. Of course, I would run like a maniac trying to answer it (Isn’t there something about “curiosity killing the cat”?) with my elbows (which I assure you wasn’t what the Creator had in mind as their function) only to find it was a telemarketer or perhaps as it was this time, someone who wanted to see “what’s new” in my life. As I politely begin to “chit-chat”, I notice paint dripping down my skirt onto my carpet and “frustrated” mother is officially on the loose again! I ask my friend if I can call her back in a few hours since I am in the middle of a project. “Oh no!” she answers, “I’ll be at work by then and can’t be disturbed there.” Finally, a light goes on in my head. This homeschool is my work and I shouldn’t be disturbed either.


Take Charge of Your Hours

Yes, dear ladies, the answer is that easy. If you have an answering machine you can simply leave the following message and you will feel liberated by the second! “Thank you for calling the ________ residence, we are not able to answer the phone right now but will return most calls after 2 o’clock”.  We usually finish up “formal” schooling by noon (I say “formal” because our children are learning all day long!) but I include lunch and clean up in the time mentioned so that I can get everything in order before someone expects a phone call returned. Perhaps you will say 3 or 4 o’clock. The basic idea is to leave your self completely available to your homeschooling whims during the day.


Time to Appreciate Time

Let us be honest with ourselves, everything goes smoother when mother is home ruling the roost. When you have more control of the laundry, organization of your home and management of your meals. That is the recipe for a smooth, homeschooling day. You will have more patience to teach that math problem, administer to those cuts and bruises, and hush any quarreling with the children.

Benjamin Franklin once wrote, “Do not squander time for that is the stuff life is made of”. A homeschooling mother can think in the same terms, “Do not squander time for that is the stuff homeschooling is made of.” And when you have surrendered your schedule to your family, blessings will abound. You will reap what you sow (Galations 6)!


Other Tips to Simplify Your Homeschooling Days

Homemaking Helps for the Homeschooling Mother


Feeling Like You are Getting Nowhere? ~ A True Homeschool Story of Encouragement

For free Unit Studies, Charlotte Mason Ideas and Homeschool Helps, Visit Here.